This document will show you how to create overrides for PeepSo templates. This method works on all PeepSo plugins and there are two ways to achieve this customization. We will explain them both, but before proceeding, you will need to know few things.
- Every PeepSo plugin have templates directory where templates that show the functionalities are stored. This is how most well-coded WordPress plugins work to ensure maximum compatibility with almost any theme you can imagine, and this is why PeepSo is out of the box compatible with so many WordPress themes.
- We sometimes update our template files to accommodate new features or fix bugs. There is no way to add new feature if we don’t show it through template file, and to show it, template file must be updated. This may lead to discrepancy in features because if you modify the template file that has the new feature in newest version, then you must update your override file to actually see this new feature.
How to Find The Right File to Override? #
This can be daunting task if you’re not familiar with theme overrides, but once you understand the fundamentals, it becomes ridiculously easy.
We already mentioned every PeepSo plugin have templates directory where it stores the template files.
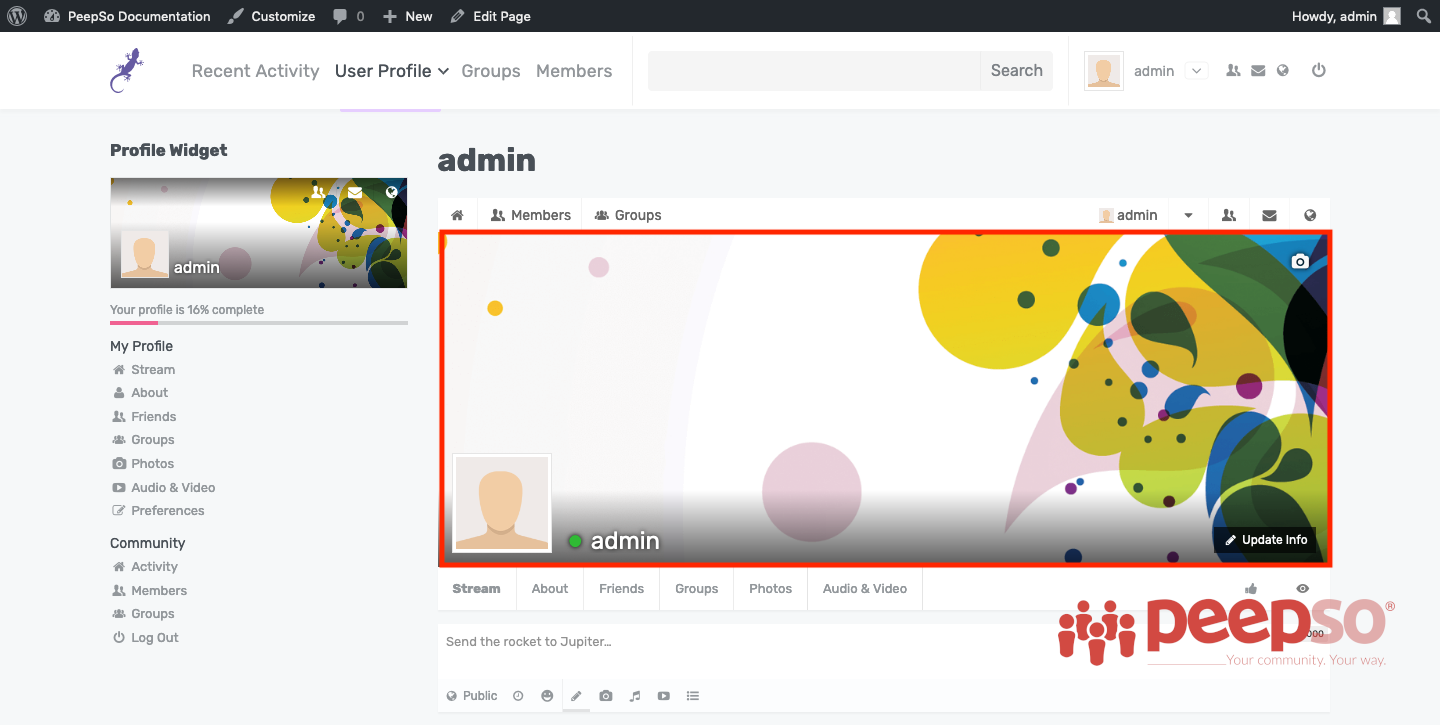
Lets try together, to find the right file which will allow us to modify the cover area in the profile
Depending on what browser you use, this first step might be different, but only in the way it’s presented. The logic behind it is absolutely the same.
We are using Firefox Developer Edition in this exercise, but you can use any browser that have Inspector tools built in.
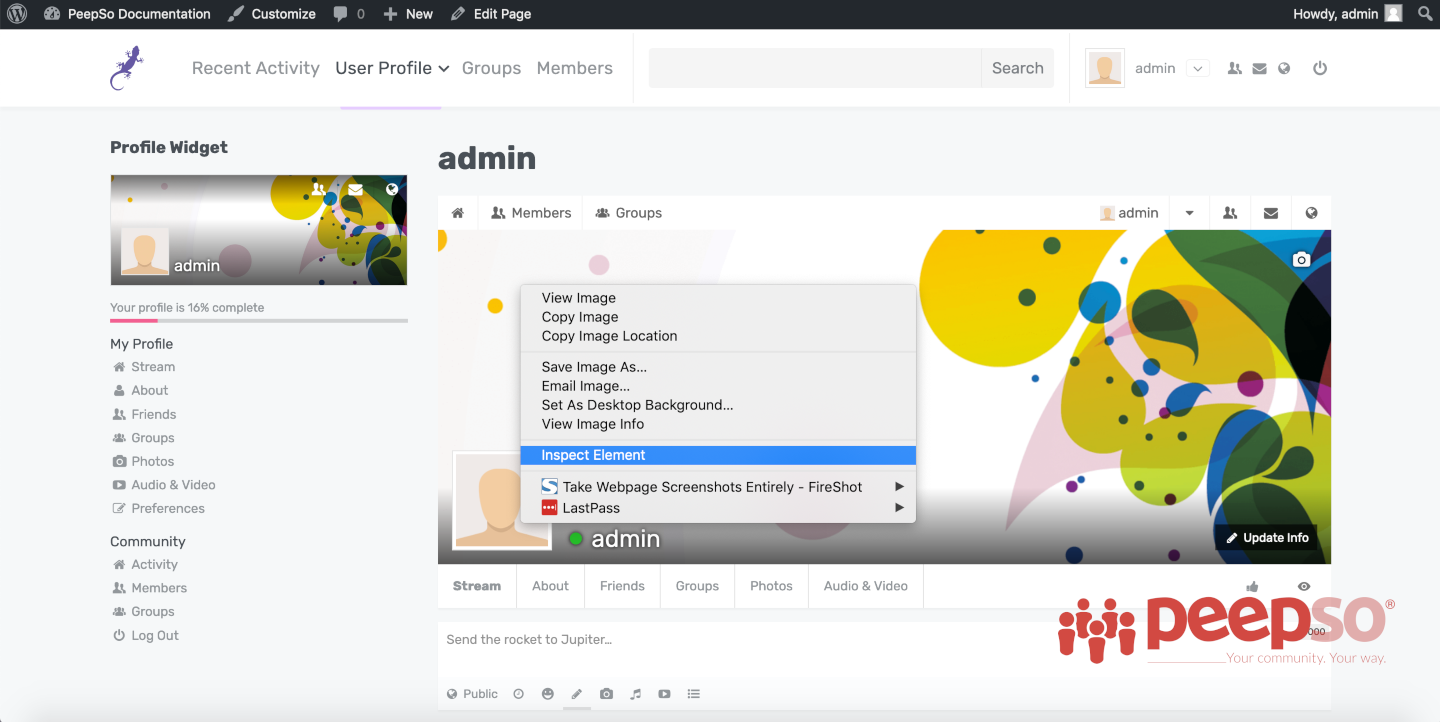
Right click on the area you want to change and click “Inspect Element”
Once clicked, the following screen will show up, highlighting the entire area you chose with the right click
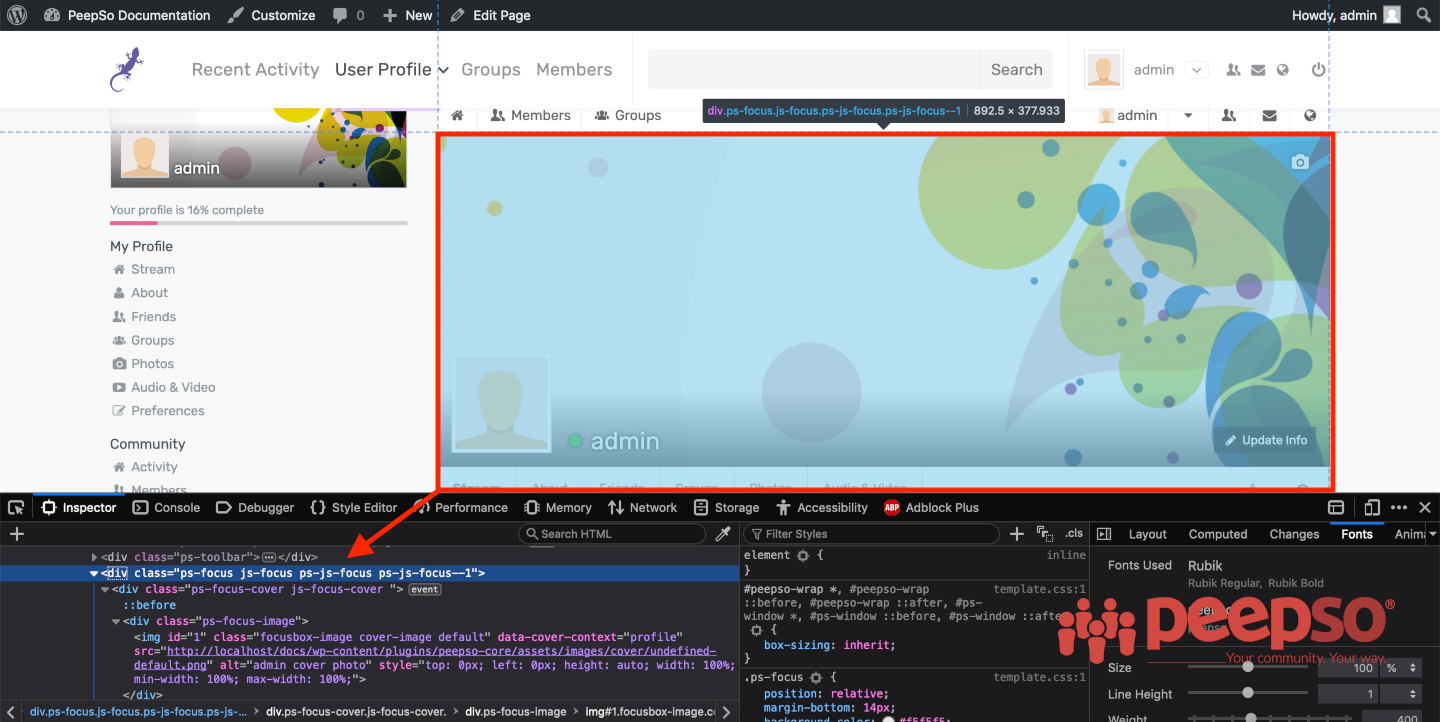
Our browser did half of the job already. We see that this particular div is styled through ps-focus js-focus ps-js-focus ps-js-focus–1 selectors.
Now lets fire up our favorite code editor and search the template files for this selectors.
We are using Brackets but you can use any editor of your choice as long as it has Find in files option
Search with Find -> Find in files option with this query
<div class=”ps-focus
The search yielded some results
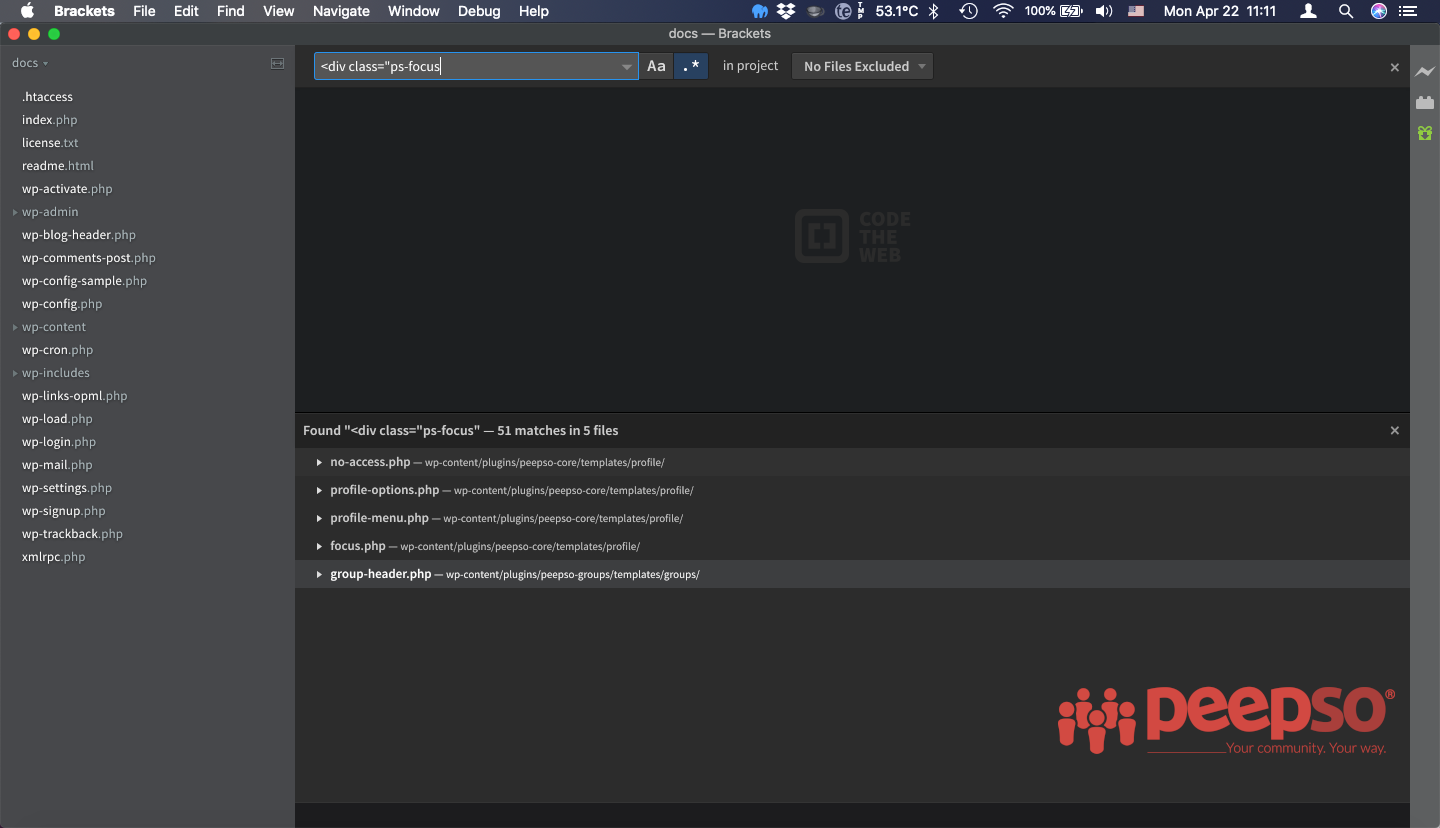
Lets analyze the result.
There are 51 matches in 5 files. So we already narrowed down our search to 5 files.
Do we need to edit the file which shows the content when user has no access? Nope? Not really.
How about profile options or profile menu? Nope. Group header? Heck no…
So we are down to the “focus.php” which looks most suspicious. And yes, you are right, that is the correct file to override.
We will us it as an example in further exercises.
Template Overrides Within Current Theme #
This is probably the most common way to override the PeepSo template files
Continuing our exercise with focus.php copy it from:
ROOT/wp-content/plugins/peepso-core/templates/profile
to
ROOT/wp-content/themes/YOUR-THEME/peepso/profile
Template Override Within PeepSo Overrides Folder #
Alternatively, you can use PeepSo overrides folder to copy the focus.php from
ROOT/wp-content/plugins/peepso-core/templates/profile
to
PeepSo 2.x: ROOT/wp-content/peepso/overrides/templates/profile
PeepSo 3.0.0.0 or later: ROOT/wp-content/peepso/custom/templates/profile


