Setting up Facebook Login requires creating the dedicated Facebook App and connecting it trough the public and private keys in the plugin configuration.
To create the app, go to: https://developers.facebook.com/apps, and click Create App.
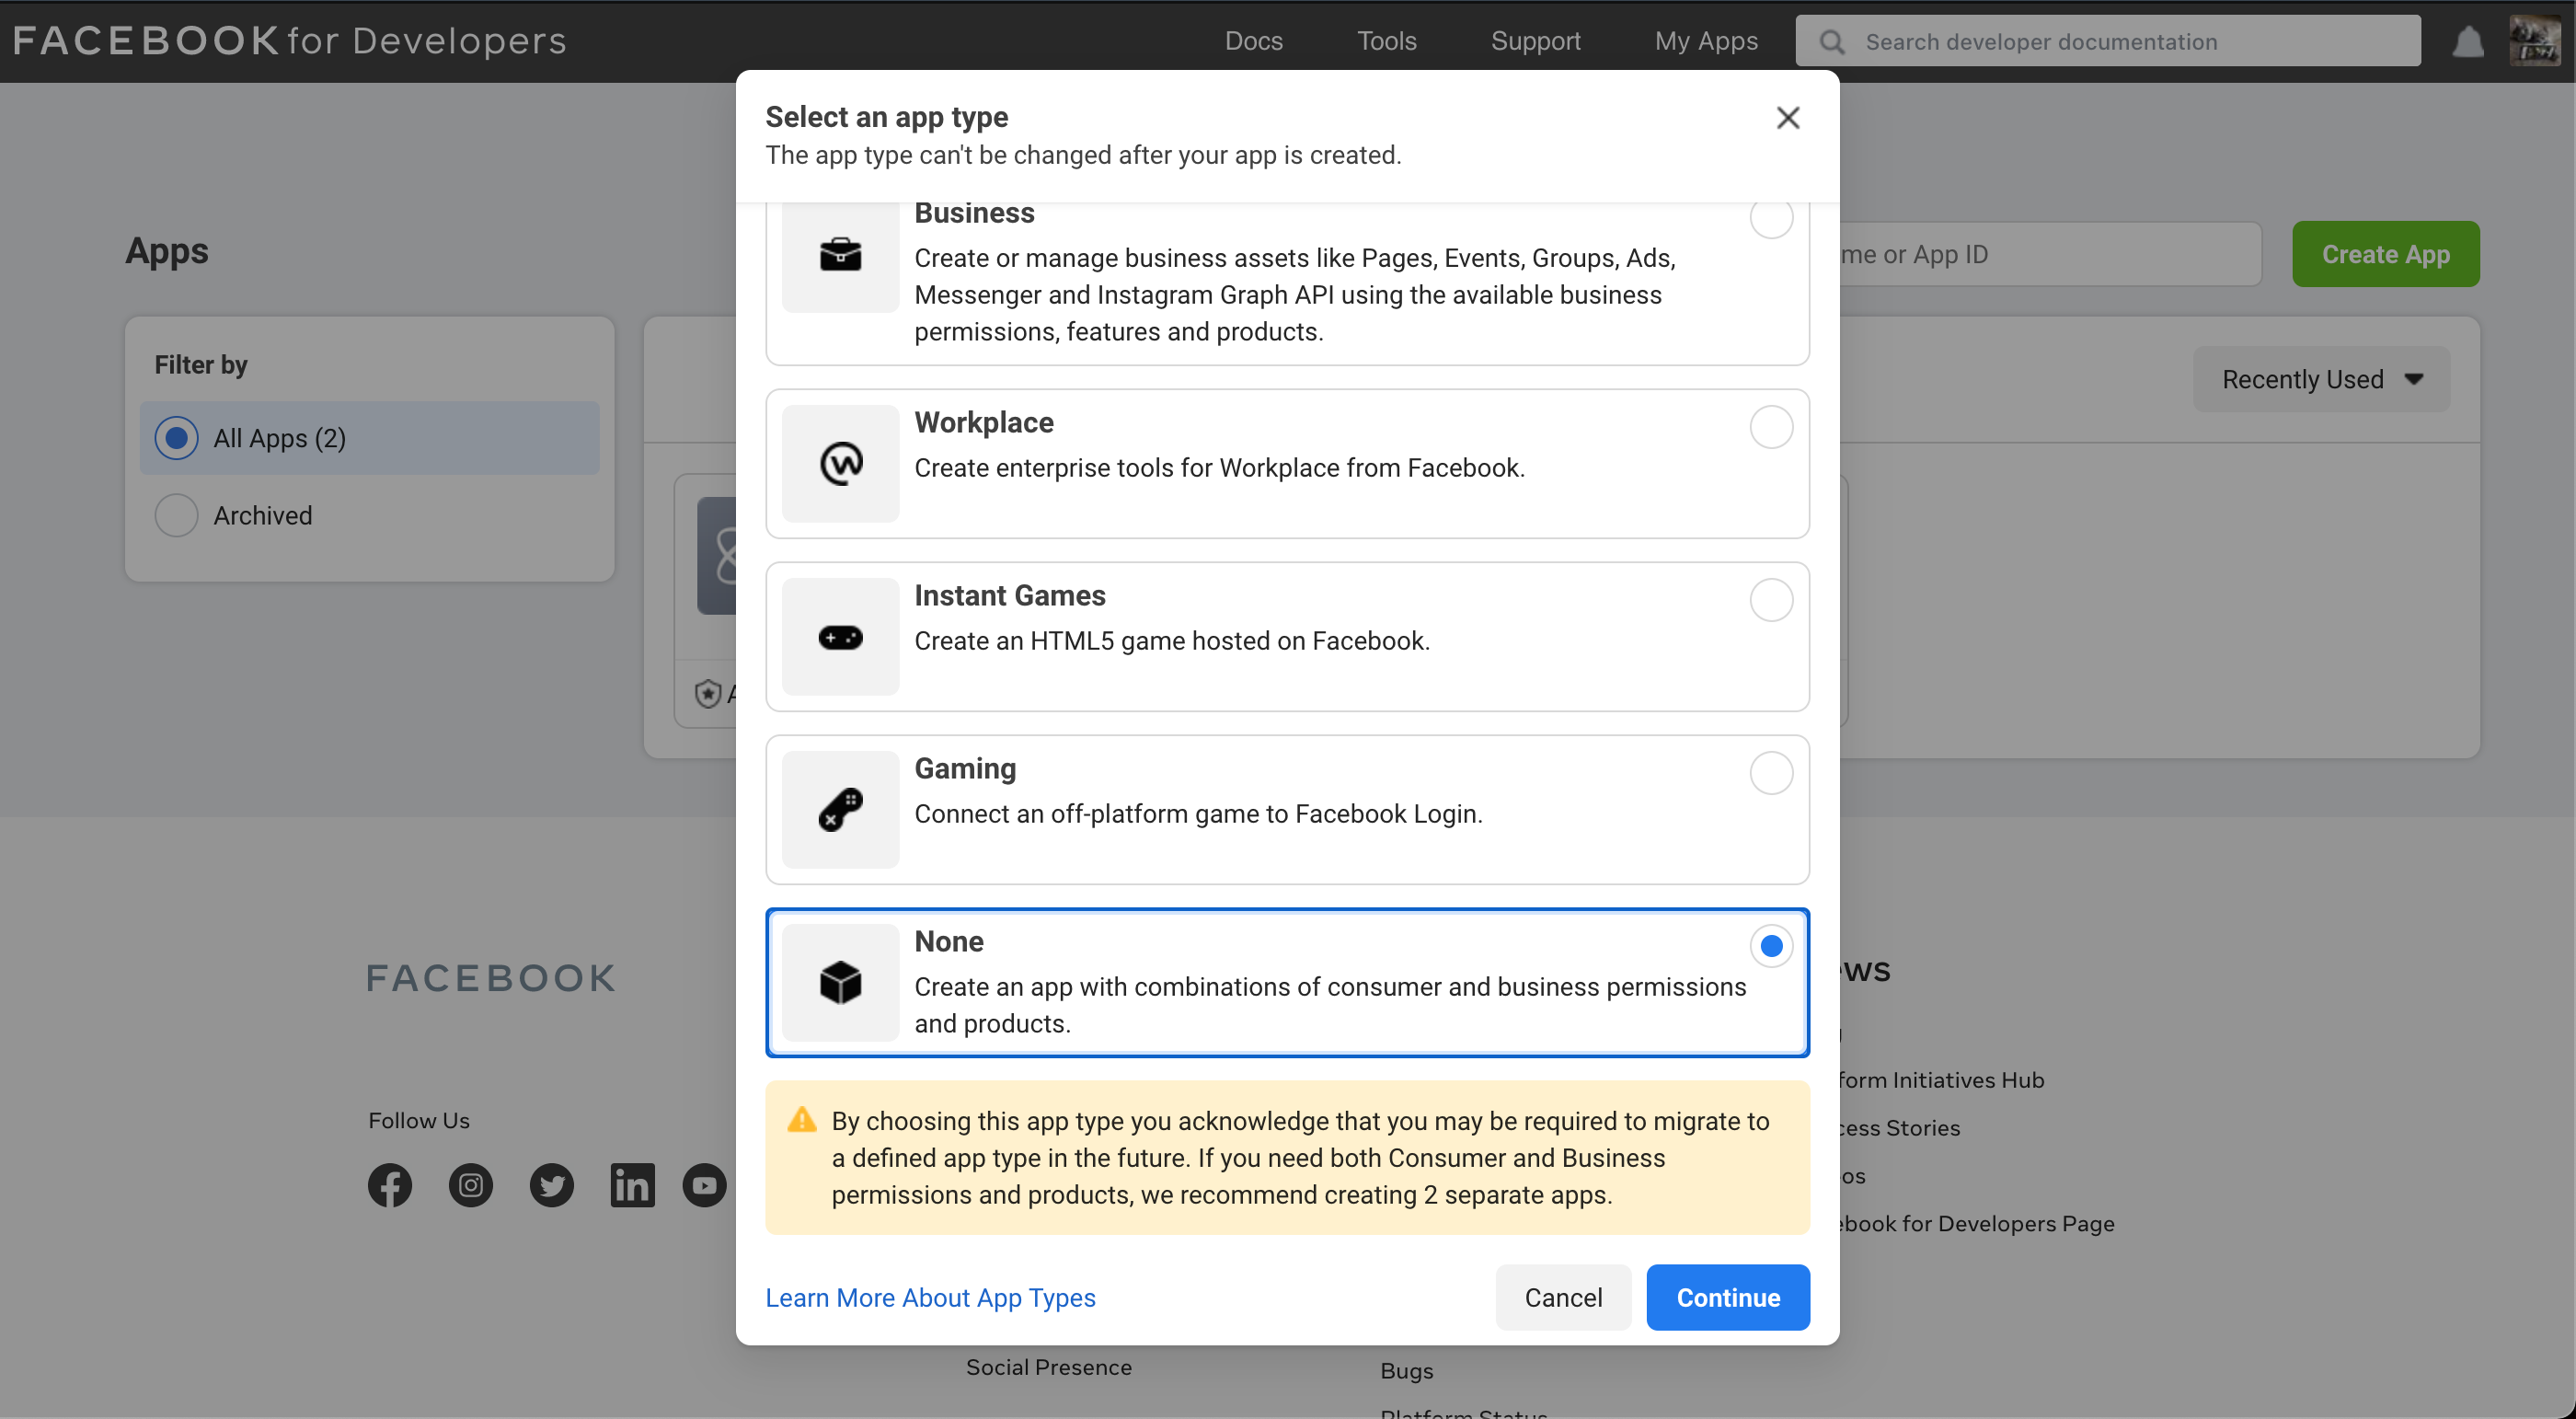
Select “None” and click “Continue”
Fill the required information and press “Create App”
You might be required to pass the recaptcha check.
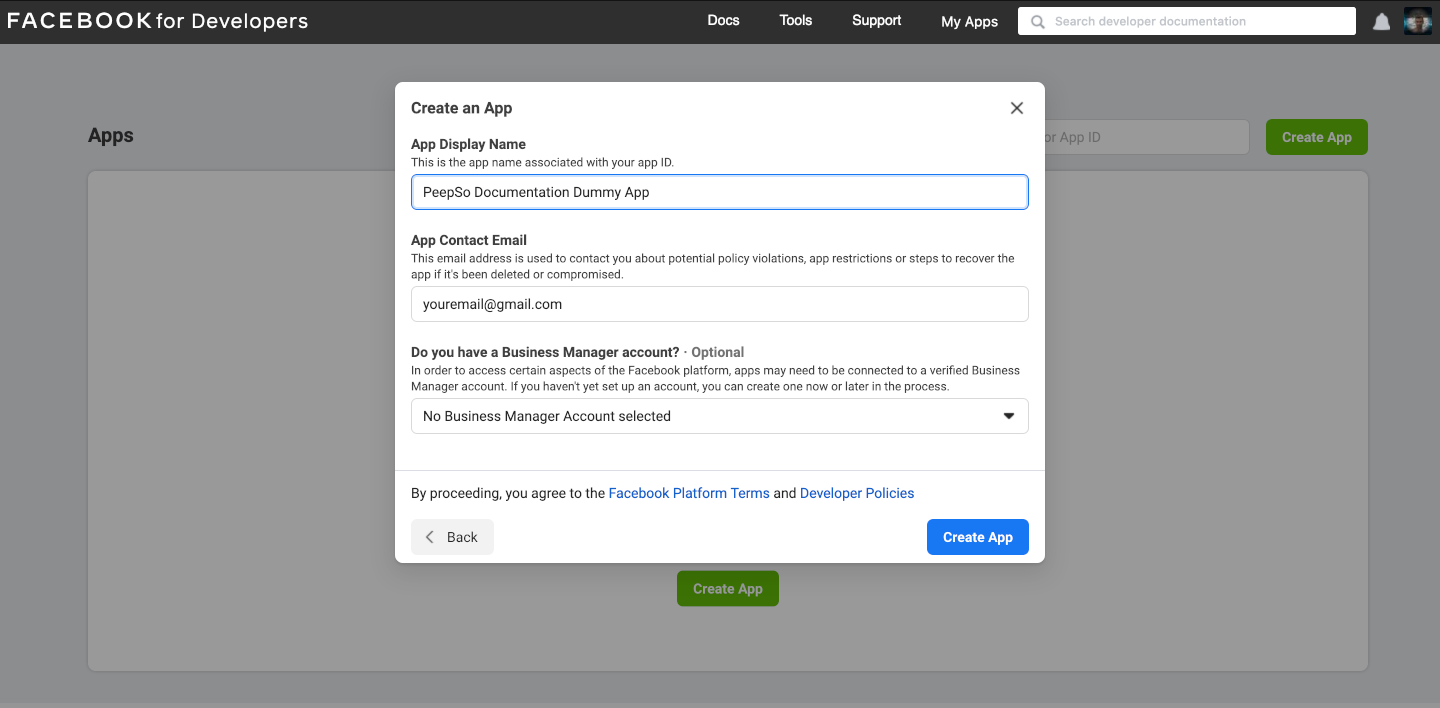
- App Display Name – This will be used on Facebook, to differentiate your created apps
- App Contact Email – Use the reachable email address
- Do you have a Business Manager account? – This is not required.
Once your app is created, the further configuration is necessary.
If you aren’t already automatically redirected to the Facebook App Dashboard, go to your Facebook Apps and open the newly created app.
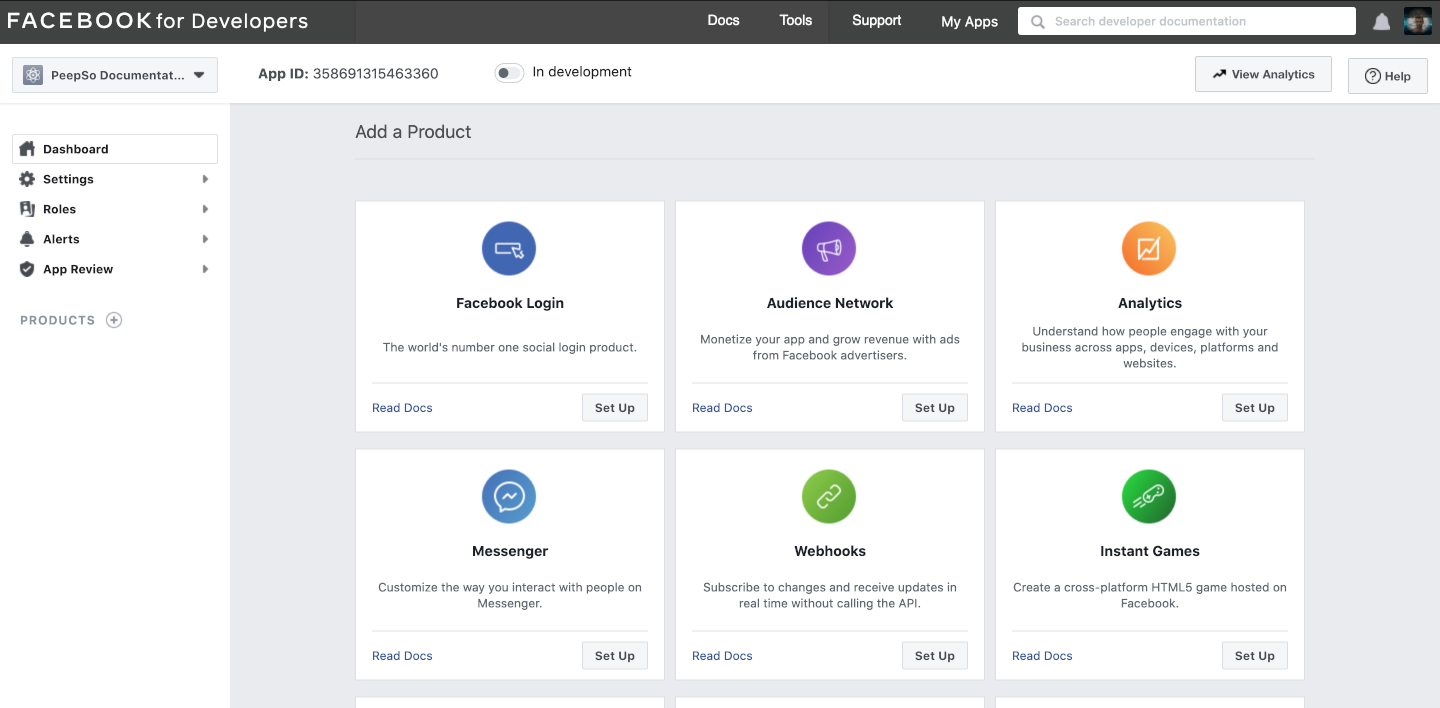
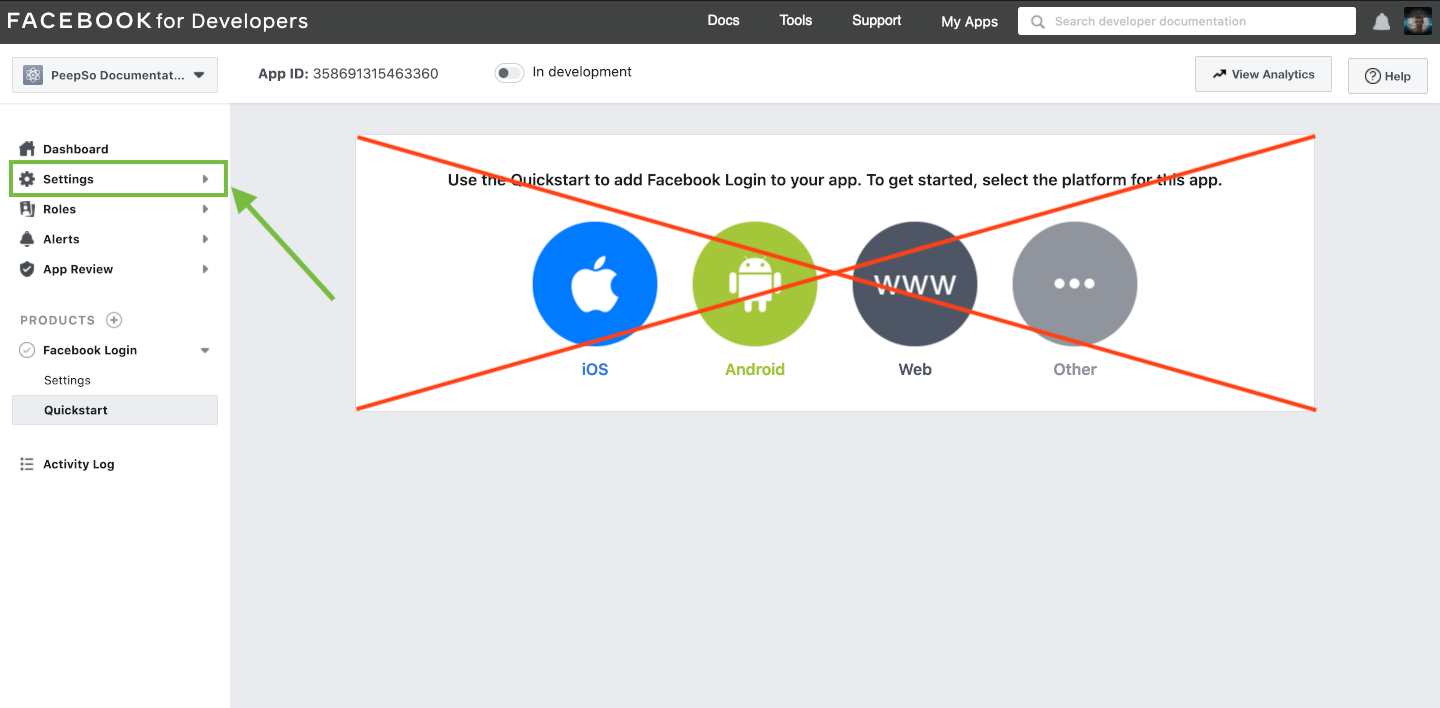
Scroll down a little bit to find the “Add the Product” section. Select Facebook Login and press “Set Up”
The new page where you can select the platform will be shown. However, there is no need to select platform, so you can ignore the big buttons. Instead, expand the Settings menu on the left-hand side as shown on the image bellow, and click on Basic
The Basic App configuration page will now be open and you need to enter additional settings.
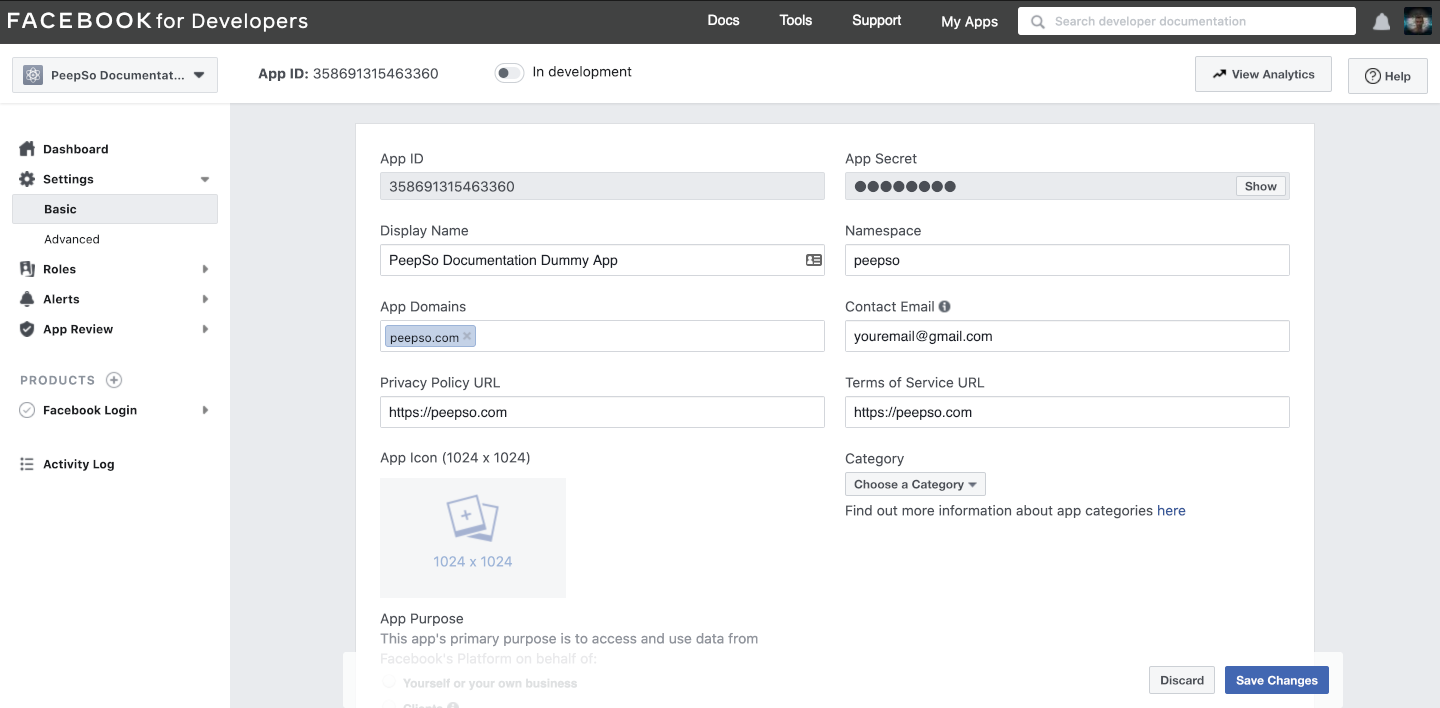
- App ID – generated automatically. We’ll use this later on in the plugin configuration
- App Secret – also generated automatically and we will use this as well in the plugin configuration
- Display Name – Will be shown as a title of the app
- Namespace – Unique namespace for this app. This can be anything really, but for the sake of standardisation we suggest that you use something simple.
- Privacy Policy URL – A link to your privacy policy. If you don’t have any this can be your site top level domain (https://domain.com)
- Terms of Service URL -A link to your Terms of Service. If you don’t have any this can be your site top level domain (https://domain.com)
- App Icon – This icon will be shown when users start interacting with the Facebook login on your site
- Category – Choose what fits your site
- App Purpose – Select “Yourself or your own business”
Save changes and look into the left-hand side menu again.
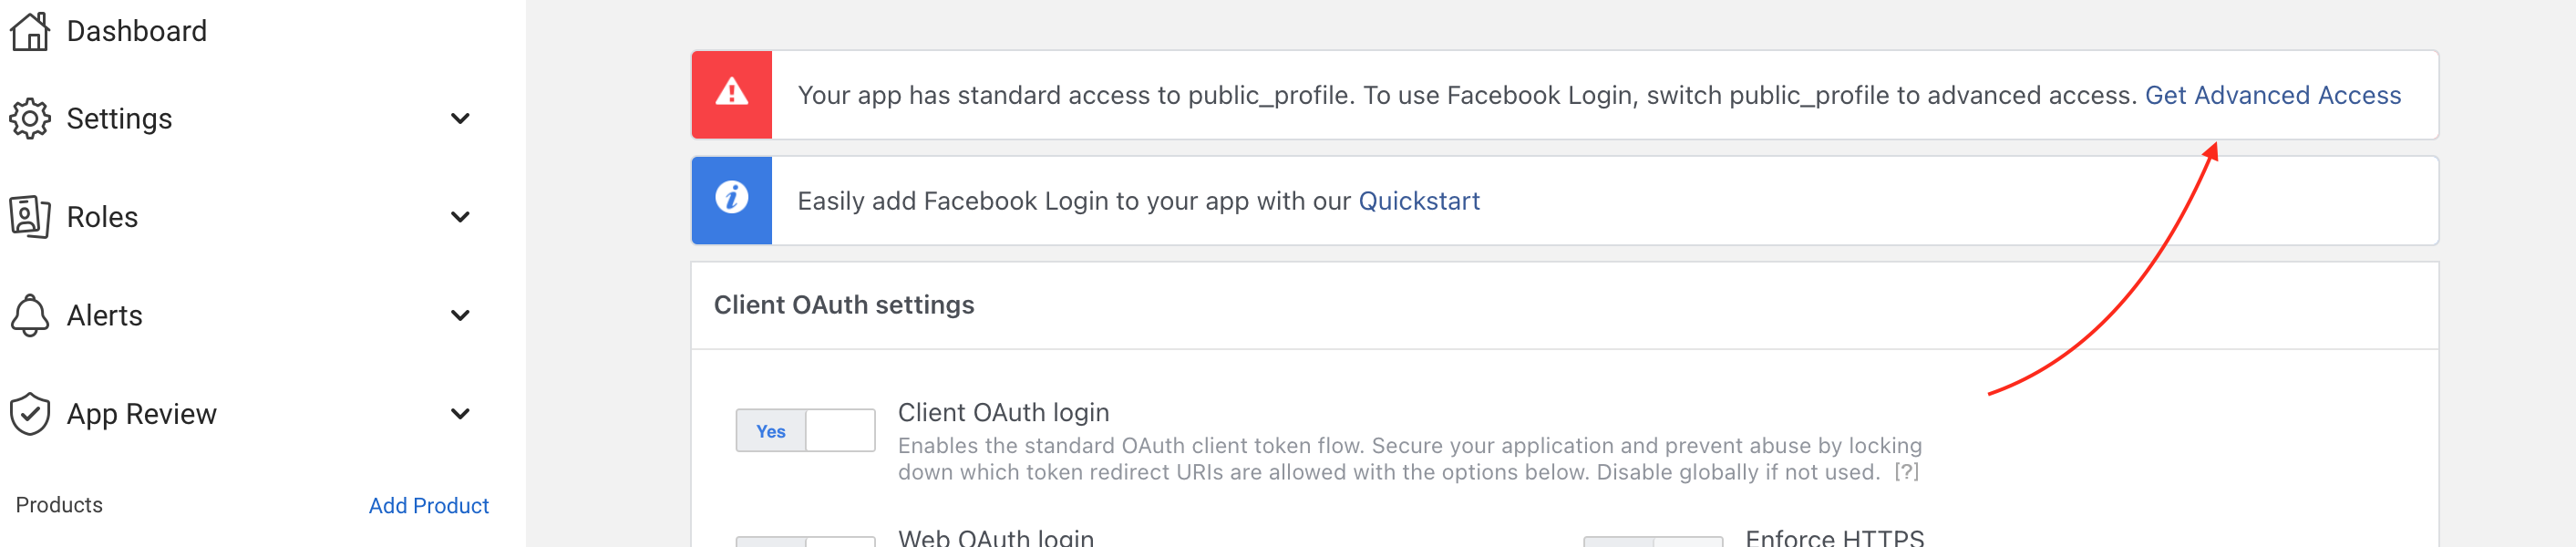
Expand the Facebook Login menu and click on Settings as shown in the image bellow

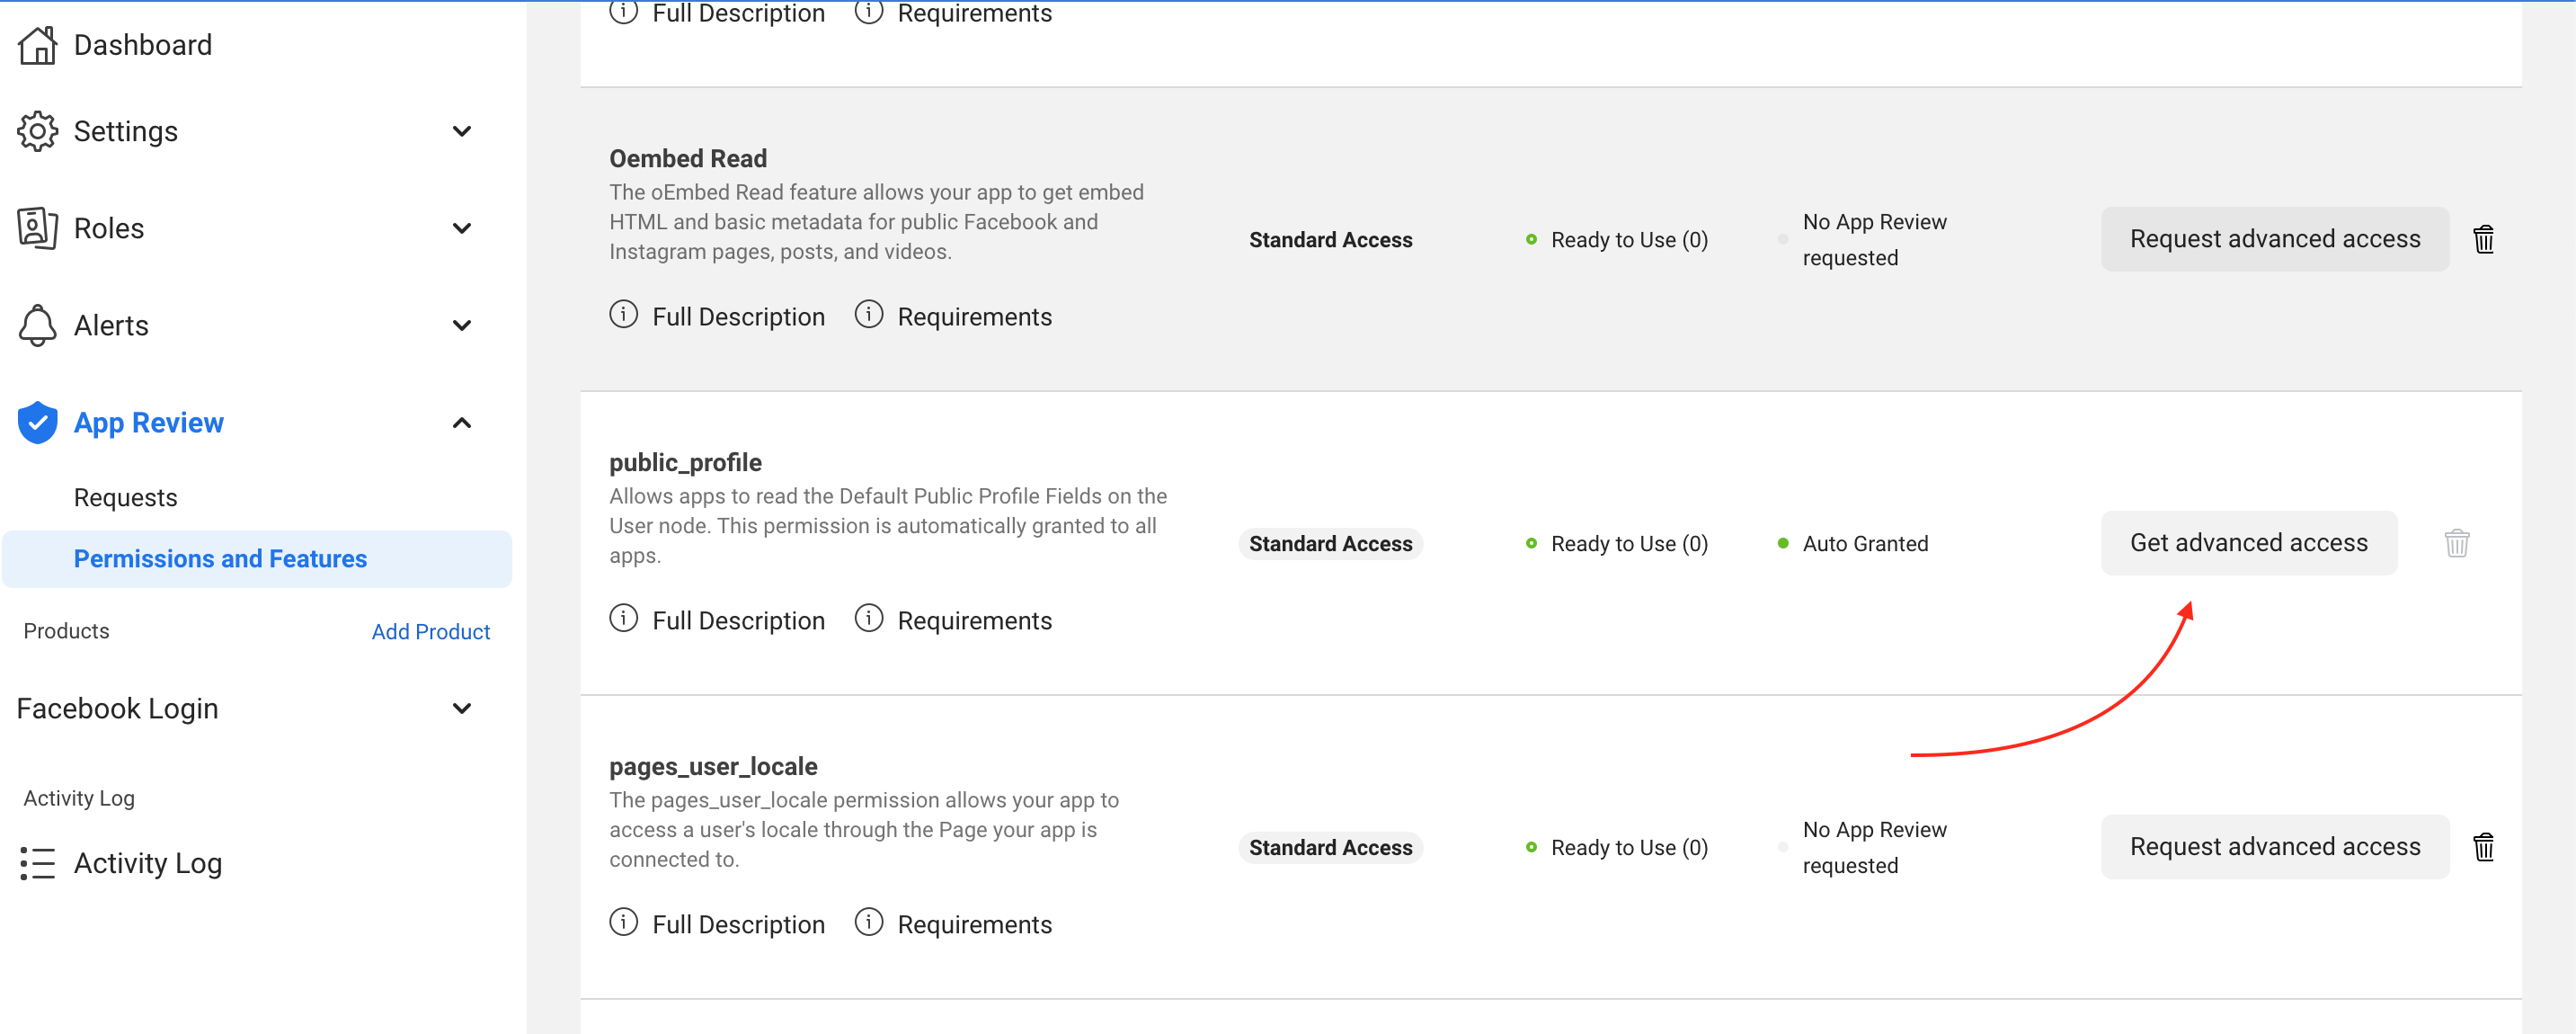
Click Get Advanced Access to switch public_profile to advanced access
Click the Get advanced access button on public_profile
After advanced access is granted for public_profile, go back to Facebook login settings. Expand the Facebook Login menu and click on Settings
In the Valid OAuth Redirect URI’s enter this string
http://your.domain/wp-login.php?action=social_login_authenticated&provider=Facebook
It is now time to make use of our new application, but before we do that, we need to make it “Live” first.
In the header of the Facebook App Dashboard, and trough many screenshots on this page, you will find the switch that says “In development”
Flip that switch to change the app into Live Mode. Once in Live Mode, the switch in header will clearly indicate this.
Go back in the left-hand side menu and expand Settings, then click Basic
Copy the App ID and App Secret and paste it to the plugin configuration.


