Creating a community site with PeepSo bundle of plugins and Gecko Theme is mostly “plug-and-play” experience. However, the huge number of configuration options in both plugin and theme can be overwhelming at the start. Not to mention configuration that sometimes goes outside the WordPress environment.
This guide will help you tick all the right check boxes and flip correct switches from the get-go, so you can avoid issues in the future.
It is also my personal go-to list whenever I’m considering a new website based on PeepSo and Gecko Theme.
Content Of This Guide
Before going forward, I have to warn you that this is a long read, and it will require a couple of hours if not more to apply everything that you will learn. Here is the breakdown of everything I am going to discuss in this article so you can skip ahead, although I strongly advise you to read everything carefully.
- The importance of the localhost and why you should have it before even thinking of a live site even if you have a one-site license.
- Why you should make initial install of any plugin, on a localhost
- How to Install PeepSo plugins
- How to install Gecko Theme
- PeepSo and Gecko Theme activation.
- The almighty Child Theme and why should you use it
- Prevent the hackers from browsing the content of the folders at your hosting
- Hide /wp-admin and /wp-login pages from automated bots
- Hide WordPress admin Toolbar
- Open VS Closed community and how to set them up
- Take advantage of almost unlimited color possibilities in Gecko Theme
- Choose default notifications and emails
- Set up the GDPR and cookie consent
- Make your site look exactly like our demo site in 5 simple steps
Have A Localhost At The Ready!
Seriously, before even thinking about transforming the wonderful idea into the website, have a localhost installation ready to use.
What is a localhost you might ask?
Localhost is nothing more than a complete web-server running on your own computer allowing you to have a testing website available even if you can’t connect to the internet.
Don’t mistake the localhost with the proper web server though, you can’t use it to host your site. At least not out of the box, because some software like XAMPP and MAMP actually allow you to do so, but this is a huge security risk for the personal data stored on your computer, so just don’t do it.
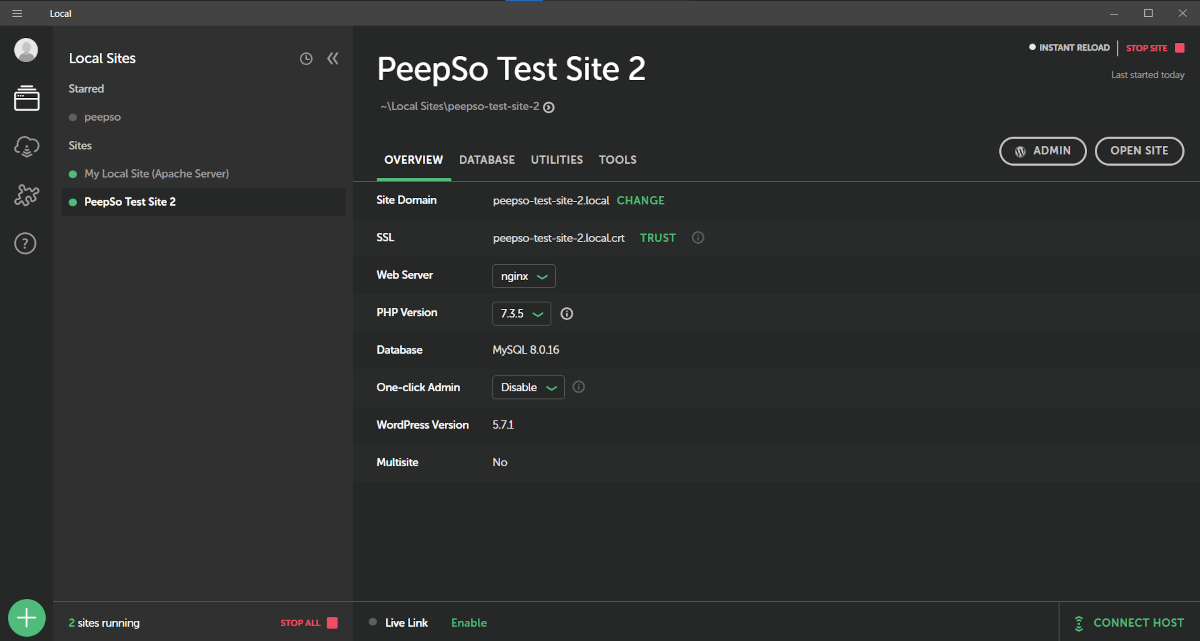
Use localhost installation for internal testing of plugins, or internal staging site development. There is plenty of software available for this purpose, I already mentioned two above, which are geared towards more experienced web developers so I can’t recommend them to the new users. Instead, download and install LocalWP by FlyWheel.
LocalWP will allow you to have the WordPress-based local website in literal seconds, you can configure what version of PHP and MySQL to use, as well as what kind of web server you want to run. It will also allow you to have a virtual domain like mytestsite.local so you can easily access the website without ever looking directly into the files.
If you are afraid that PeepSo and Gecko Theme will be activated on a wrong domain, and will use your license for a localhost, fret not! We are more than aware of this and that is why we allowed unlimited number of activation domain changes in your PeepSo account. Simply go to your account, expand the “Purchases” tab, navigate to “Licenses” and click on “Manage Domains”. Once there, you can enter the new domain where you want PeepSo plugins and Gecko Theme to activate.
If you don’t want to jump over the hoops of switching domains back and forth, contact us and we will gladly add staging or testing domain to your license as long as your testing domain is reasonably similar to the live domain actually used for the site.
The example of proper testing domain when we will gladly allow usage of multiple domains is as follows:
Live site: https://domain.com
Test Site or Localhost domain: https://domain.local or https://dev.domain.com or https://domain.dev and similar variations.
The following example will not be honored:
Live site: https://domain.com
Test Site or Localhost Domain: https://mysite.net or any other variation that uses completely different structure of the domain name
Initial Installation
I know that having a new website ready to go instantly is a tempting proposition, but do the first installation on a localhost. In this article, we will assume that you know how to install WordPress plugins and Themes. If not, there will be a short written tutorial below this section.
Do this for every plugin you want to use. Don’t just throw it on the site and expect everything to be set to your likings. While most WP plugins will instantly work, their default configuration usually won’t suit your needs.
That is why it is wholeheartedly recommended to try out new plugins on isolated, test site, rather than just throwing it into production and expecting that everything will just work exactly how you wanted it. Once you are familiar with the plugin, or a theme for that matter, once you know what it will do to your site, or where to find specific configuration within the plugin or a theme interface, only then consider installing it to the live site.
PeepSo and Gecko Theme Installation For Dummies
Skip this section if you know how to install WP plugins and Themes.
Installing PeepSo Plugins:
- Go to the PeepSo website in the downloads section.
- Download all plugins that you want to use and save them somewhere on your computer. Remember where you saved them.
- Go to the backend of your website and navigate to “Plugins” -> “Add New”
- Click on the “Upload Plugin” button and browse to where you saved the downloaded plugins.
- Install peepso-foundation-core-X.Y.Z.X.zip (where XYZX is the version number of the currently available plugin)
- Repeat the process for all additional plugins you want to use
Installing Gecko Theme:
- Go to the PeepSo website in the downloads section.
- Download Gecko Theme installation package to your computer
- Go to the backend of your website and navigate to “Appearance” -> “Themes” -> “Add New”
- Click on “Upload Theme” and browse to the location where you saved the Gecko Theme installer.
- Press “Install Now”
Both installation processes should be done only once per website. Upgrades do not require manual file upload – although that is the option too if you prefer to do it that way, or in a case when automatic upgrade is not possible.
Activate Your Installation
PeepSo and Gecko Theme will refuse to work until you enter the proper license number. You can see the license number when you are logged in at the PeepSo.com site and inside your profile. Open the “Purchases” tab and switch to “Licenses”.
To activate PeepSo, go to the backend of your site (that is WP Admin) and navigate to “PeepSo” -> “Configuration”
Flip the switch to “Use a PeepSo Bundle License” and enter your license number.
To activate Gecko Theme, navigate to the site backend, then go to “Gecko” -> “License”.
Enter the license number there.
Child Theme
In my previous blog about code snippets, I briefly touched the subject of a child theme and why are they important. To keep it short, child themes are great and you should create one immediately after installing the theme. We use it on all our sites, and it is my personal preference to create the child theme as soon as I start developing a new website.
If you don’t know how to create a child theme manually, use this plugin to create one for you and immediately uninstall the plugin once the child theme is created.
Child Theme is great for future-proof development as it allows you to modify the visual look or functions of your website through CSS and PHP if you have some basic skills, but even if you don’t, you should use the child theme, sooner rather than later, you will decide to try out some manual code change and child theme will be your first point of interest in doing so.
How Does The Child Theme Work?
Child theme will load all assets and inherit the styling of the parent theme, however, it will also allow you to add custom code changes to the style.css and functions.php file without losing those changes after the parent theme update.
Consider that we update Gecko Theme approximately every two weeks, creating the child theme for it is a paramount.
I Updated The Parent Theme But WordPress Still Shows Available Update For Gecko Theme
When you use a child theme, this is absolutely normal, because the child theme will use an obsolete version number. To fix the annoying nag after updating the parent theme, go to the backend of your site, navigate to “Appearance” -> “Theme Editor”.
Read the popup window carefully and press “I understand” to proceed.
In the “Theme Files” sidebar on the right-hand side, select “Stylesheet (style.css)” if it’s not already selected.
In the editor, locate the line that says “Version: x.y.z.x” where xyzx is the obsolete version numberUpdate the version number to the latest one from the parent theme.
The full guide is also available here.
Unfortunately, this is the manual process that needs to be applied every time you update the parent theme. There is no other way around it, however the benefits of a child theme heavily outweigh the 30 seconds hassle of updating version number.
Disable Directory Browsing
You may need to contact your hosting support because this is a server configuration and can not be controlled through WordPress interface.
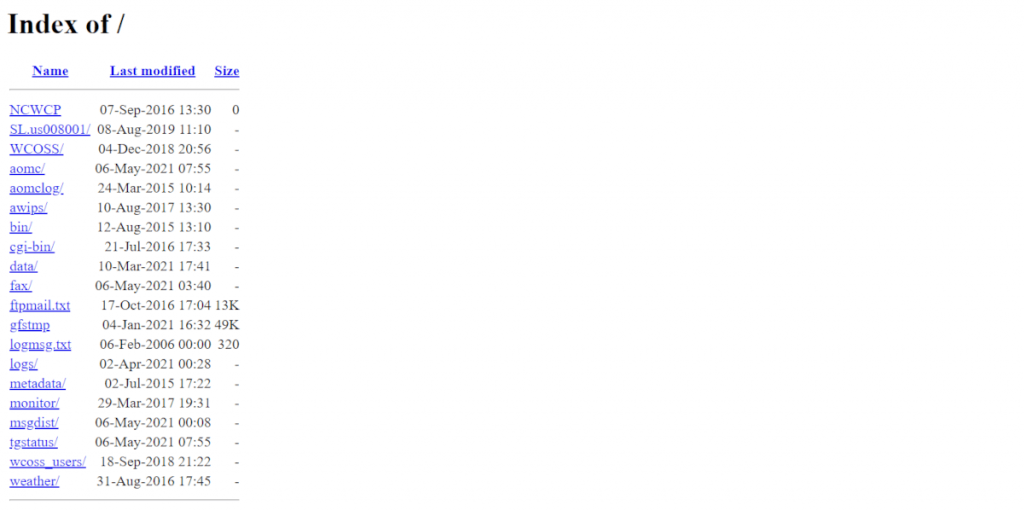
You should do this to prevent people (read: hackers) from browsing the directories using a web browser. Also, a web server that is configured to display all the contents of your website would lead to an information disclosure issue. For example, your users might upload images in the album that is set with “Friends Only” privacy, but the physical file still sits somewhere on the server. If accessed directly completely avoiding the website interface, everyone will still be able to see the image, regardless of the privacy level assigned to the album in PeepSo.
Here is another scenario. Let’s say you have a site with the following domain name – www.domain.com and you create a new folder with the name “mystuff”.
If directory browsing is enabled, everyone will be able to easily access all the files inside the mystuff folder by merely typing https://domain.com/mystuff/ in the browser.
Disabling the directory browsing requires root access to the web server so contact your hosting provider to do it for you.
Hide WP-Admin & WP-Login From Prying Eyes
WordPress is a multi-user platform and as such it has built-in options for users to register, login and manage their WordPress profile. Since we are going to use PeepSo to manage all of this, some redundant pages are still available for the general public.
Believe it or not, these pages are also the primary target for automated bots and spam registrations that happen on the site so disabling them is the smart thing to do. I can recommend this plugin to do so.
What it will do is basically change the URI of your wp-admin part of the website so https://domain.com/wp-admin becomes https://domain.com/whateveryouwant
You need to make sure to remember or bookmark the new path, because you won’t be able to login to your site backend if you forget it. Keep it simple, but at the same time hard to guess.
NOTE: PeepSo offers the configuration option to redirect default WordPress registration page to PeepSo registration, but it doesn’t hide the wp-admin part so it’s still strongly recommended to use this method, for increased security.
Hide WordPress Toolbar
While we are at the subject of hiding things, the most annoying one is the WordPress Toolbar that shows to all logged in users by default.
Luckily, Gecko Theme comes to the rescue.
Navigate to the site backend and open “Gecko” -> “Gecko Customizer”.
Expand the “Theme” options and locate the “Show WP admin bar” option. By default in Gecko 3, this is set to Admins Only, but you can completely disable (or enable) it for everyone by selecting “Always” or “Never” options.
Time To Decide – Open Or A Private Community?
Gecko Theme has a built-in option to redirect all non-registered users to the “landing page” before allowing them to browse the content of your website. In other words, if a user is not logged in, all they will be able to see is the landing page where they can login, or registration pages where they can create the new account.
To enable this feature, go to “WP Admin” -> “Pages” and create the page like any other and give it a title, but do not enter any text or other content.
On the right-hand sidebar, expand the “Page Attributes” panel if it’s not already expanded and select “Landing” as a template.
Expand the “Featured Image” panel and set the image that will be displayed on this new landing page.
Publish the page and exit back to WP Admin interface.
Now go to “Gecko” -> “Gecko” options.
You will see the feature to “Redirect guests to” and then the dropdown option that will allow you to select your landing page. Save changes.
If you wish to add exceptions to the redirection, for example, Terms Of Service page, or License agreement page, you can simply add the page ID of these pages into the “Redirect exceptions” box.
Note that you don’t have to add registration pages to the exception list. These pages are already ignored by default and won’t be redirected.
Now that your community is accessible only to registered and logged in users, it might be a good idea to change some privacy levels.
Go to “WP Admin” -> “PeepSo” -> “Configuration” -> “Stream Posts” and change default post privacy from “Public” to “Site Members”.
Because Public privacy level does not make sense anymore, it may also be a good idea to completely remove it from the entire system.
To do so, add this code in your child theme functions.php file:
add_filter('peepso_privacy_access_levels', function($levels){
  if(isset($levels[PeepSo::ACCESS_PUBLIC])) {
  unset($levels[PeepSo::ACCESS_PUBLIC]);
}
return $levels;
});
Unlimited Shades Of Every Color!
If this is the first time using Gecko on the particular site you are working on, then it is the best time to create “Preset” for the site. Two (2) default presets, Gecko Light and Gecko Dark can not be edited and serve only one purpose of reverting all the changes to default state so you can easily duplicate it and create a new preset if you’re not happy with the last one you tried to make.
To make a new preset, simply select one you prefer (light or dark) and click on a “Duplicate” button. Once Gecko makes the duplicate preset, you can rename it or delete it, but don’t forget to Save and Publish it in the top right corner option, so that preset is actually applied. You will know it is applied because it will have the (default) flag next to its name. Gecko is packed with features and options that would require a completely separate dedicated blog post to explain to every detail, but to get you started, this is all you have to know for now.
I do encourage you to explore the options on the localhost before applying them on a live site.
What About Email?
Email is the primary means of communication between your site and the user so you need to make sure they are all in order. Go to “WP Admin” -> “PeepSo” -> “Configuration” -> “Edit Emails” and double check them all. This step is particularly important if your site is not in English language.
Now switch to the “Notifications” tab in the main configuration.
On this page you can choose the default set of on-site and email notifications that the user is going to receive without their explicit intervention.
If you host your site in European Union, or you know that you’ll have at least one (1) user that is a resident of any EU country, I strongly recommend to disable all email notifications by default. Let the user explicitly choose what emails they wish to receive from your site, in their profile configuration.
GDPR
If your site is hosted in EU, or you’ll have users from the EU, just enable it. On new PeepSo installations this option is automatically enabled in the “Advanced” configuration.
Cookie Consent
GDPR requires your site to throw a cookie notice for new visitors of the website and this must be done through third-party plugins. Starting with PeepSo 3.4.0.2 we offer the BETA integration with Borlabs Cookie plugin that allows you to have this consent notice.
Make It Look Like Our Demo Site
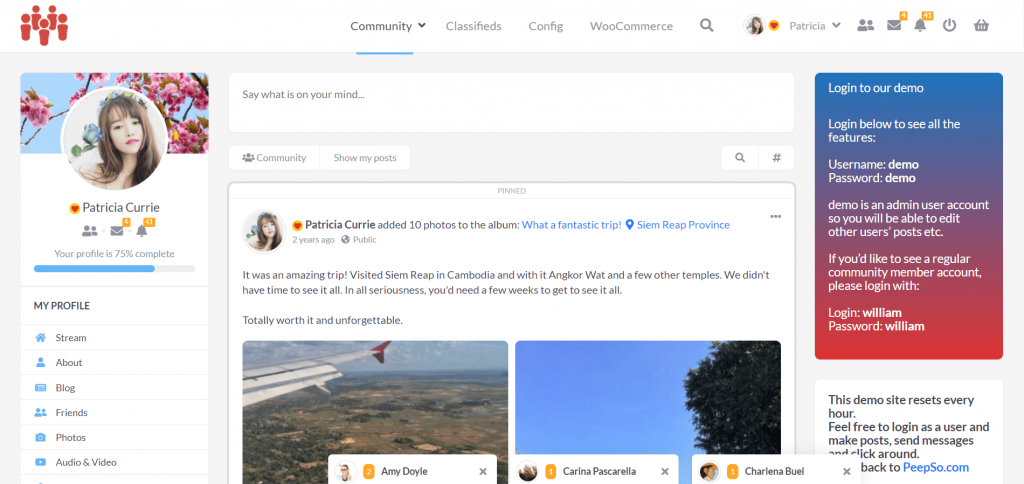
Often asked question is how to make your website look exactly like our demo site.
Unfortunately, there is no automatic installer for this purpose available, but you can do it easily following these simple steps.
Step 1: Choose your homepage
This setting can be found in “WP Admin” -> “Settings” -> “Reading”
Change what your home page will display to “Static Page” and select “Recent Activity” for home page as well as “Blog” for your blog page.
If you don’t have the “Blog” page, simply create the new one in “WP Admin” -> “Pages” -> “Add New”. It should be a blank page with no content in it.
Step 2: Publish sidebar and footer widgets
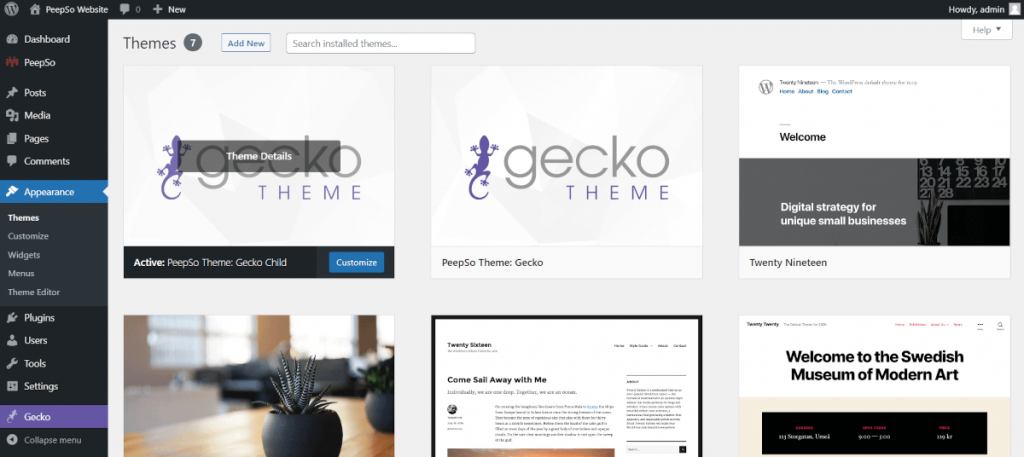
Go to “WP Admin” -> “Appearance” -> “Themes” and make sure that “Gecko Child” theme is an active theme for the site. Hover over the thumbnail of the theme and press “Theme Details”. Once that page is open, press “Customize”.
If you’re sure that the Gecko Child is an active theme for your site, you can also open the WP Customizer directly by going to “WP Admin -> Appearance -> Customize”.
Once there in customizer, expand the “Widgets” tab and then select “Sidebar Left”
Here you can decide what widgets will be shown in the left sidebar. I suggest publishing the “PeepSo Profile” widget at the top of the left sidebar and then whatever widget you want bellow it. Do the same procedure for the “Right Sidebar” and “Footer” widgets.
Please note that sidebar widgets will be stacked vertically, from top to bottom, while footer widgets are stacked in horizontal columns, one next to the other. You can have up to six (6) columns. Default value is four, and you can change that in “WP Admin” -> “Gecko” -> “Gecko Customizer” -> “Theme” -> “Layout” -> “Footer” under “Footer Widgets” options.
Step 3: Header options
Go to the “WP Admin” -> “Gecko” -> “Gecko Customizer” -> “Site” -> “Logo” and set your logos for both, desktop and mobile devices. Save the changes and go back to the WordPress backend.
Now open “WP Admin” -> “Appearance” -> “Menus”.
If this is the new site, you’ll need to create the new menu. Do so now by entering the mane name, for example “Main Navigation” and selecting the “Header menu” checkbox. Once saved, at the left-hand side you’ll see the list of all pages, posts, custom links and categories that you can add to the menu.
My personal preference is to keep the main navigation as simple as possible. Add very few links to main parts of the website, or if you want to make it more complex, make sure to utilize the submenu option available in WordPress so that navigation structure is still relatively simple at the first glance. Gecko Theme supports unlimited submenu levels.
Finally, publish the “PeepSo UserBar” widget in “Header Widgets” position.
Step 4: Get rid of the “doubled” navigation
Now that we use the Gecko header for site navigation, and the UserBar widget is showing us the notifications, there is a redundant navigation bar on top of all PeepSo pages.
To disable this bar, go to “WP Admin” -> “Peepso” -> “Configuration” -> “Appearance”. Find the option to disable the PeepSo navigation bar and turn it on.
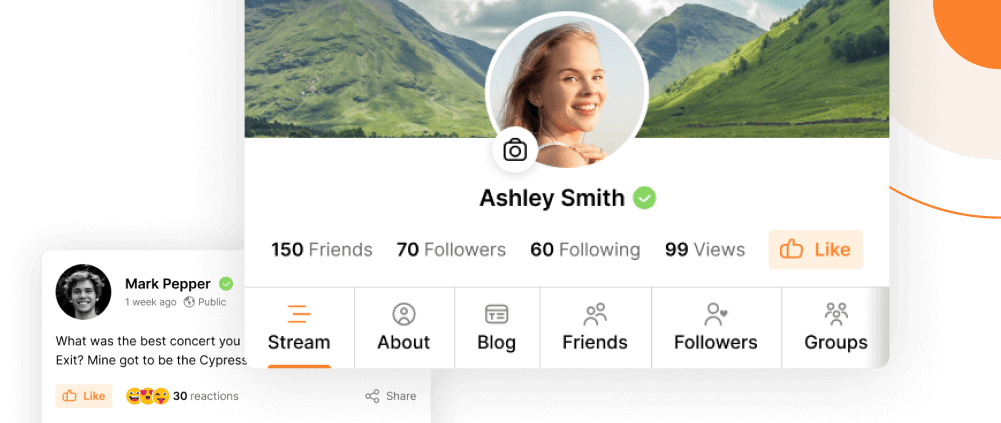
Step 5: Choose your profile layout
Gecko Theme offers three (3) different profile layouts that you can choose from.
Go to “WP Admin” -> “Gecko” -> “Gecko Customizer” -> “PeepSo”
One of the first options there is to choose the profile cover size. Selecting the different size will also impact the layout of the entire profile page. Choose the one you like the most.
Congratulations! If you followed all steps to the letter, you’ll now have the site that is safe from bot attacks on your login and wp-admin pages, it is safe from hackers trying to browse the content of the folders, and site that structurally looks exactly like our demo. All you have to do now is to enrich it with the content.
I hope this tutorial was helpful to you and that you have developed your skills and WordPress knowledge a little further. If you have any questions do post them in the comment section below. I’ll be happy to answer them all.
Reactions & comments
Comments