How often have you found yourself wanting to change the font size or the background color of the widget, increase the icon size, or move the border just one or two pixels to the left? Did you then go to the settings, only to find there is no setting for what you need to do?
In most cases, visual things can easily be adjusted with CSS and tools natively available in the browser, though you probably didn’t know they are there or how to use them. In the first part of this blog series I will try to demystify the web inspector tool, one of the most commonly used tools in frontend development today. And before you ask, no – you don’t have to be a frontend developer to understand the basics of it.
It Started With Firebug
Back in 2006, a group of developers had created a Firefox plugin called Firebug. It was a simple, single tab browser console add-on for debugging JavaScript. As years passed, it had grown into a full-fledged web inspector tool. It was discontinued in 2017 and its legacy has been moved into the modern Firefox browsers. Firebug is easily the pioneer of the web 2.0 era, as it defines how frontend developers interact with HTML and CSS and how they debug JavaScript.
All popular browsers nowadays have built-in inspector tools that are based in one way or another on the foundations that Firebug had set. Luckily for us, it is not a competition. By understanding the developer tools in Firefox, you will know how to use them in Google Chrome, Opera, Safari, or vice versa. In this blog post I will use Google Chrome as an example. It is not my go-to browser for day-to-day use, but it is the most popular and by many accounts it has developer tools which are easiest to understand.
Jumping The Cascade
Before moving to the real examples, a basic understanding of CSS is required. If you don’t know what CSS is, how it works and what is its purpose, it will be very hard to understand what the heck is going on in the inspector tool. In a nutshell, Cascading Style Sheet or CSS is the code that ultimately determines visual identity of your site, it controls the colors, paddings, element sizes and their relation to one another, but it does so many other things as well, like making the website responsive. In a standard “load order” multiple CSS files can be loaded on a single page, and they may contain exactly the same code. If this is the case, the last loaded style will be applied.
Practical example:
Files named style1.css, style2.css and style3.css are all loaded on the same page in that particular order and they all contain the same code like this:
.wife {
	right: 100%;
	margin: 0;
}
This means that the element with a class wife will be pushed 100% to the right and there is zero margin on the element. It also means the wife is always right 🙂 Now, let’s say we edit the file style1.css and change the code to:
.wife {
	right: 50%;
	margin: 0;
}
What do you think will happen?
The only correct answer is, nothing will happen. Remember: Cascading Style Sheets do just that, they cascade and only the last loaded style is applied. If we change the code in file style3.css or change the load order making style1.css to be the last loaded style sheet, then the change will be applied.
This is exactly how overrides in WordPress themes are working.
There are exceptions to this rule using !important flag, but this is a bad practice that is frowned upon and never advised.
Every frontend developer out there
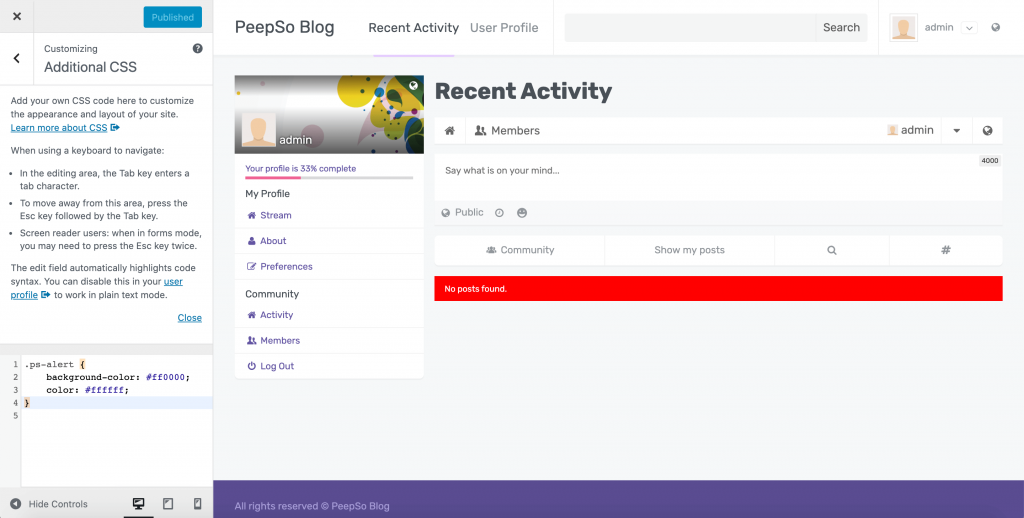
WordPress Customizer is available for everyone and it is designed with this “last loaded style applies” method to allow for customizations and overrides. You can easily access it by going to WP Admin -> Appearance -> Customize -> Additional CSS
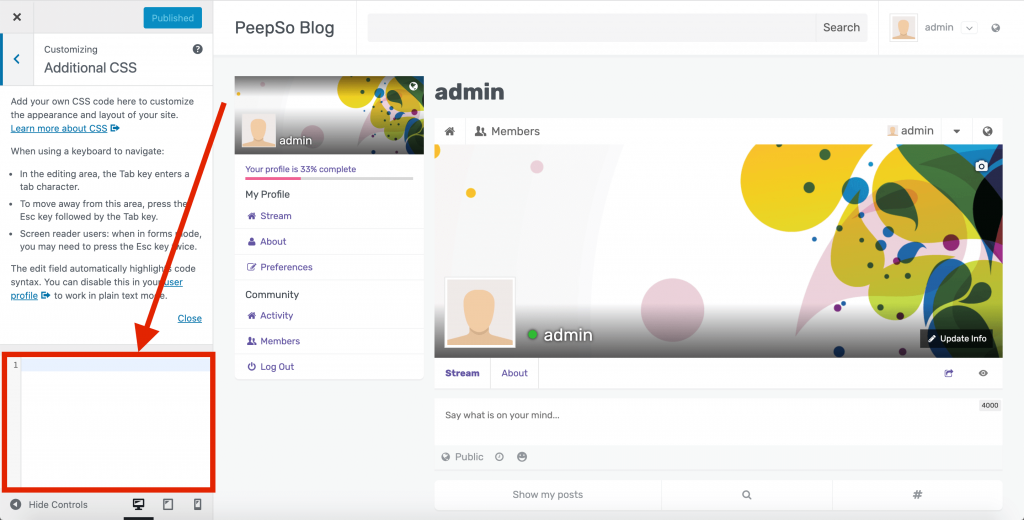
Whatever you add here will be loaded last and hence applied to the final design.
Use Developer Tools To Find What Requires a Change
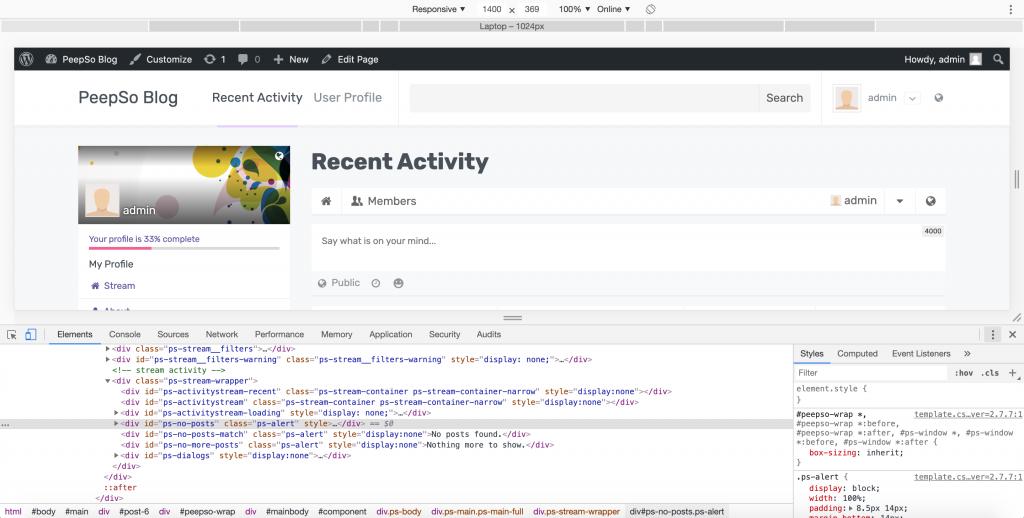
The fun part of the inspector or developer tools is that it can show the entire HTML structure and applied CSS with a simple click of the mouse button. Right click anywhere on the page and select Inspect option.
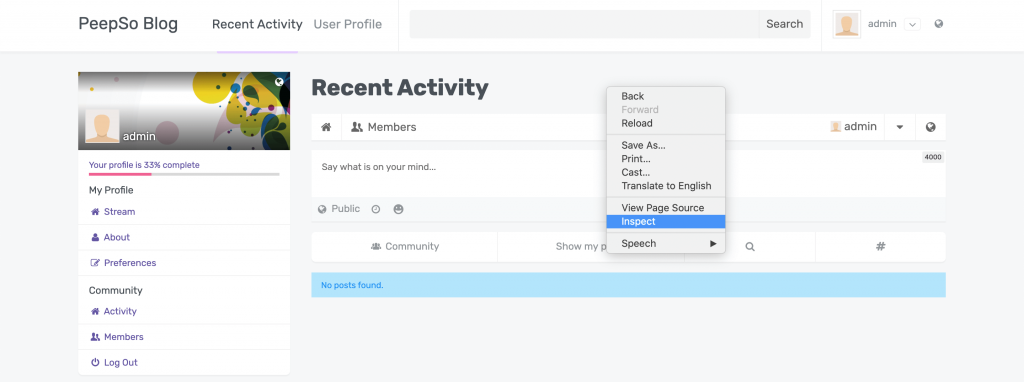
The following screen will open:
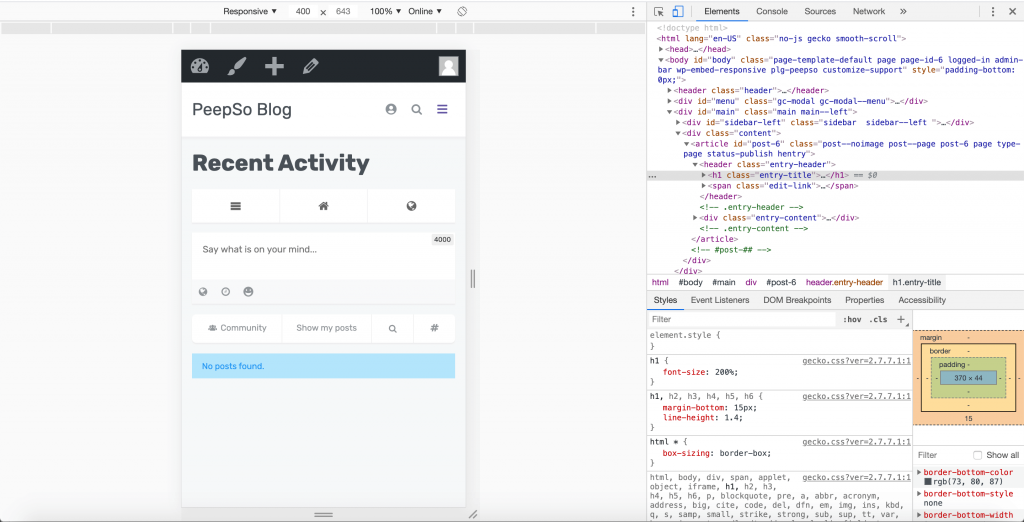
You’ll notice the inspector tool appears on the right, while the site has been reduced to responsive resolution of the mobile phone. This is the default behavior of modern inspector tools because of the “mobile first” development approach, but do not worry, it can easily be changed.
In the top right-hand corner next to the X button, press on the three vertical dots icon and choose the layout you’re most comfortable with. I personally prefer the layout that puts the dock at the bottom of the page, because it allows me to play around with different width sizes and screen resolutions.
Now that you know how to access the inspector, let’s try to change some elements together.
PeepSo Example: Changing the PeepSo alerts text and background color
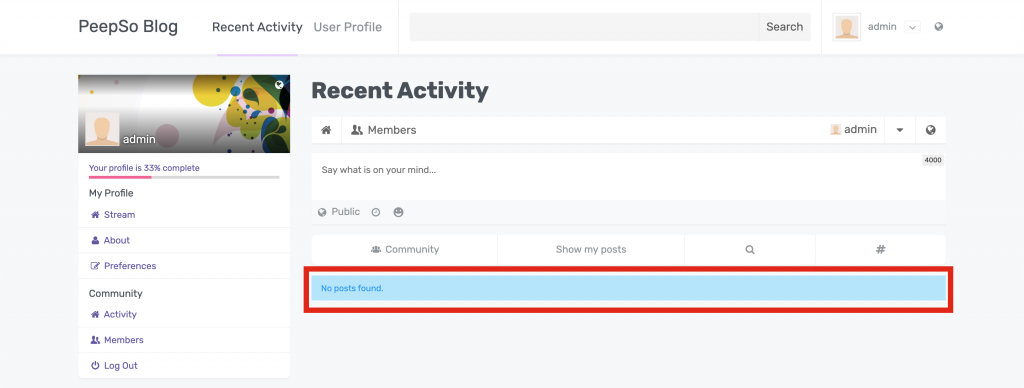
Desired result:
- Background of the alert informing us that there are no posts found needs to change from light blue to bright red
- Text color of the text within the alert has to be white
Exercise:
- While the page is open, right click on the blue banner and select Inspect option as instructed earlier.
- If the inspector didn’t find the proper element immediately, you can use the “Select Element” option in the Inspector toolbar to fine tune your selection and select exactly what you want to change.
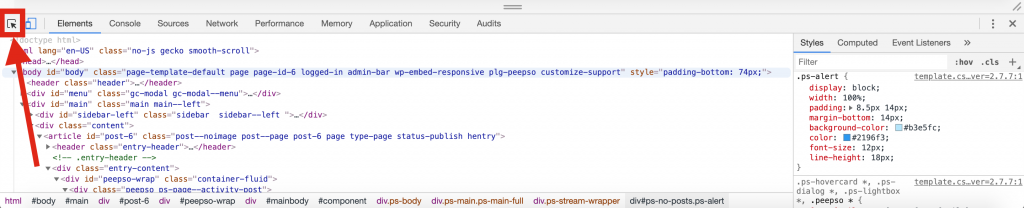
When manually selecting the element, you’ll notice how it changes color and provides additional information about styles applied to the selected element. You can also see this information in the lower right-hand corner of the inspector.
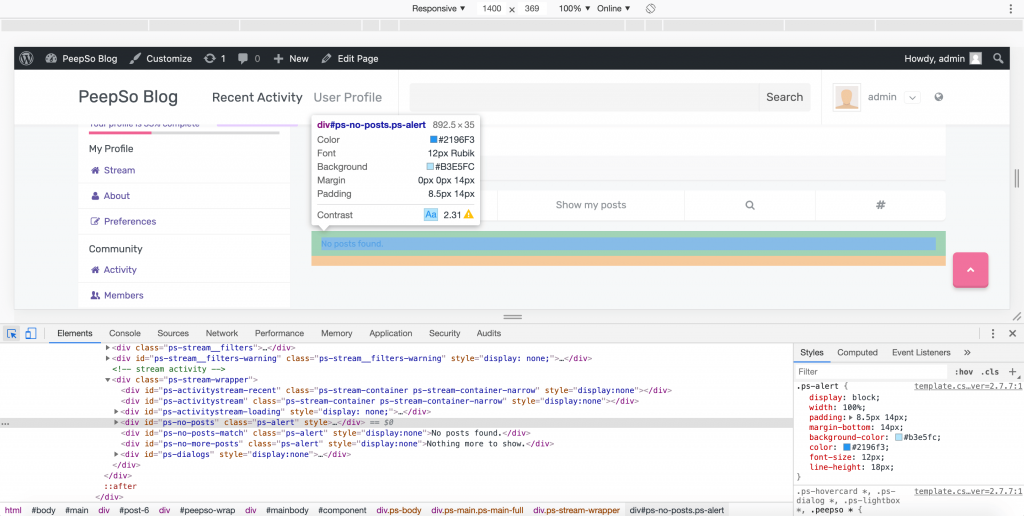
The style we are looking to change is applied through
.ps-alert {
    display: block;
    width: 100%;
    padding: 8.5px 14px;
    margin-bottom: 14px;
    background-color: #b3e5fc;
    color: #2196f3;
    font-size: 12px;
    line-height: 18px;
}
Because we only need to change the colors, we can shorten that and apply new values like this:
.ps-alert {
    background-color: #ff0000;
    color: #ffffff;
}
There is no need to use the properties that are not overridden. Remember, CSS files cascade, and the last loaded value will apply to all selectors, so in this case only values for background-color and color will change, while everything else will remain the same.
Adding this code to the WP Admin -> Appearance -> Customizer -> Additional CSS will apply our change:
Final Word
This method is exactly what we do when you ask us how to change the color, how to increase font size, how to increase padding etc. It looks daunting when you open it for the first time or misclick on it while using the browser, and I’m sure many of you were wondering what the heck is going on there. I hope I managed to shed some light on the subject matter and helped you make your site pixel-perfect.
In the following updates to this blog series, I will touch on subjects such as using the Inspector tool for site debugging, advanced customization and finding JavaScript/CSS conflicts and clashes.
Meanwhile, these are additional resources you might want to take a look at:
- Chrome DevTools Tutorial: https://developers.google.com/web/tools/chrome-devtools
- W3Schools CSS Tutorial: https://www.w3schools.com/css/

Reactions & comments
Comments