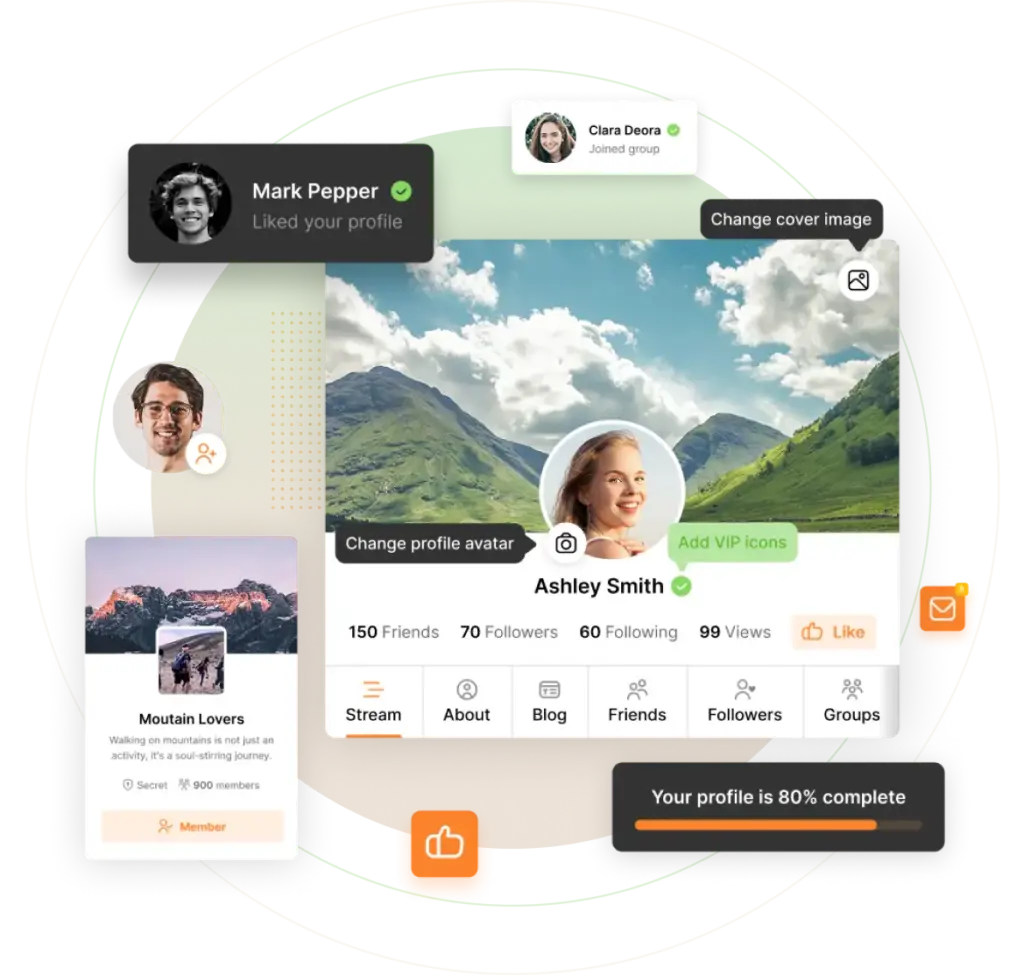
The PeepSo Block Theme is finally available to all Ultimate Bundle license holders, but as with most new technologies, it has brought a fair amount of confusion. This is especially true for users who are used to traditional, or how they are officially called, Classic WordPress themes.
It’s never easy to let go of everything we’ve learned and dive into something completely new. That’s why, in this post, we’ll walk you through the transition from Classic to Block and show you how to design your website by building templates with blocks.
This guide will not teach you how to change your site’s colors, adjust paddings and margins or what each block does, or make fancy animations and complex mega-menus. Instead, it will help you unlearn the old ways of the Classic Theme and fully embrace the world of Full Site Editing with Block Themes.
What Makes Block Themes Different
If you’ve only ever used Classic Themes, like Gecko, and never tried building a site with a Block Theme, the shortest description is this: everything is different. Everything you’re used to with a Classic Theme simply doesn’t apply to Block Themes, and you basically have to start from scratch.
Author’s note: It’s important to understand that the Block Theme is not a replacement for the Gecko Theme. If you simply disable Gecko and activate the Block Theme expecting everything to look the same, you’re in for a surprise. These are two completely different themes built on entirely different logic.
Since we released the PeepSo Block Theme, we’ve mostly pointed users to the existing WordPress documentation like this one. Objectively, however, that documentation often feels like it was written for someone who already has a lot of prior knowledge about Block Themes.
Take this paragraph from official WordPress documentation as an example
To work with the Site editor, you need to use a block theme on your site. A block theme is a theme that uses blocks for all parts of a site, including navigation menus, header, content, and site footer.
Yeah, cool, everything sounds fine, but how exactly am I supposed to use it?
That’s the part we’re here to explain.
Our goal is to introduce Block Themes in a way that makes it immediately clear how to use them, whether you have prior experience with Block Themes or none at all, which is something many third-party and even official WordPress documentation often fails to explain.
Learning to Walk Before Running
Interestingly, Block Themes and Full Site Editing (FSE) are not exactly new in WordPress. Back in (very) early 2022, WordPress 5.9 introduced both Block Themes and FSE, and if you’ve been using Gutenberg to create your posts and pages, you’ve already been using some of these tools. So FSE isn’t really a new concept. It’s been around for handful of years already.
For simplicity and a streamlined setup, this post will focus on creating a new site on a test domain or local host. Once we learn the basics, it will be easy to apply them to an existing site.
To follow along with this tutorial, you’ll need:
- A clean WordPress installation, without additional plugins
- PeepSo Block Theme (available to Ultimate Bundle license holders)
- PeepSo Free (we won’t be using any PeepSo features, but plugin will be needed to create the necessary PeepSo pages that will be shown in the guide.)
New Beginnings
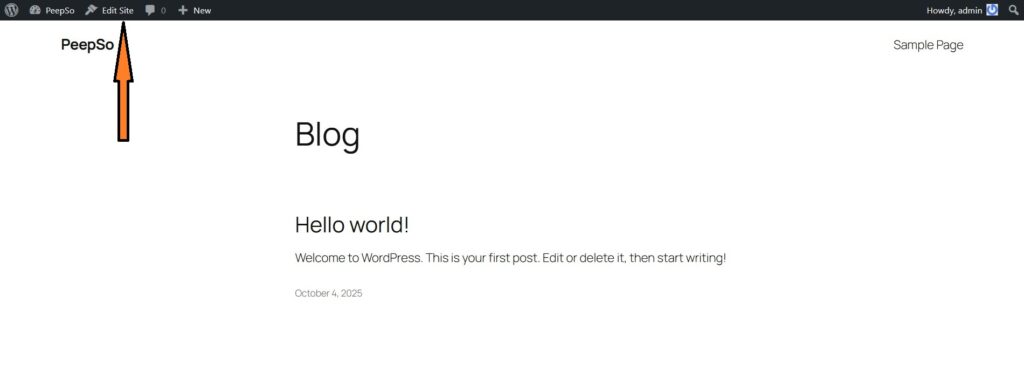
On a fresh WordPress installation, a basic Block Theme is included by default. This means you can start using a Block Theme right away. Currently, the default theme is Twenty Twenty Five, which traditionally changes each year and is named after the current year. By now, we’ll assume you’ve all seen a new WordPress installation at least once and can recognize this screenshot.
Author’s note: If the screen below looks different, you’re either from the future or the past and using a different default WordPress theme. This tutorial is based on the default Twenty Twenty Five theme.

Those with a sharp eye will notice the “Edit Site” button in the admin bar. That’s how WordPress expects you to access the editor and start designing your site, and that’s perfectly fine. It’s just… a little confusing at first.
After you click it, WordPress will now enter Full Site Editing (FSE) mode, but it does not provide any further explanation or instructions. It expects users to already know what they are doing.
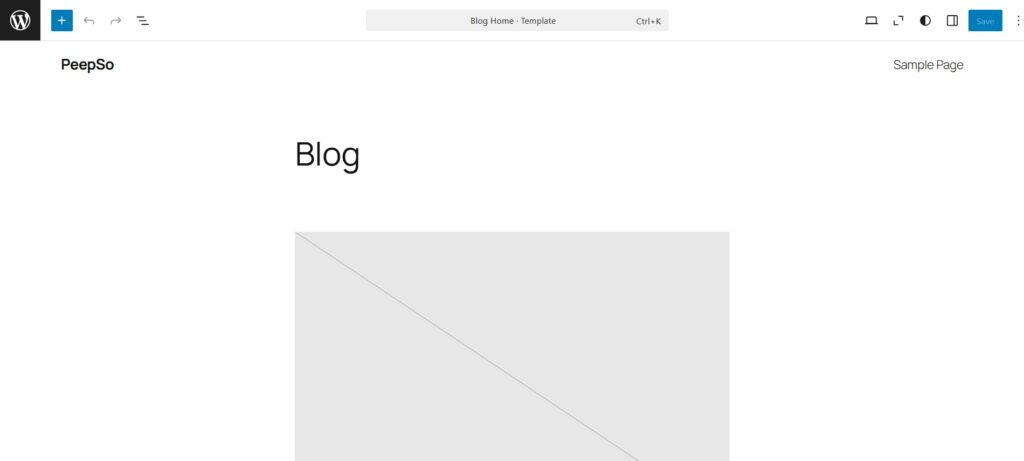
This is probably the most non–user-friendly introduction to a feature I’ve seen in over two decades of working with different CMS platforms. And to make things even more confusing, it doesn’t open the editor’s start page. It opens a blog template instead. Yes, template. Get used to that term, you’ll be hearing it a lot.
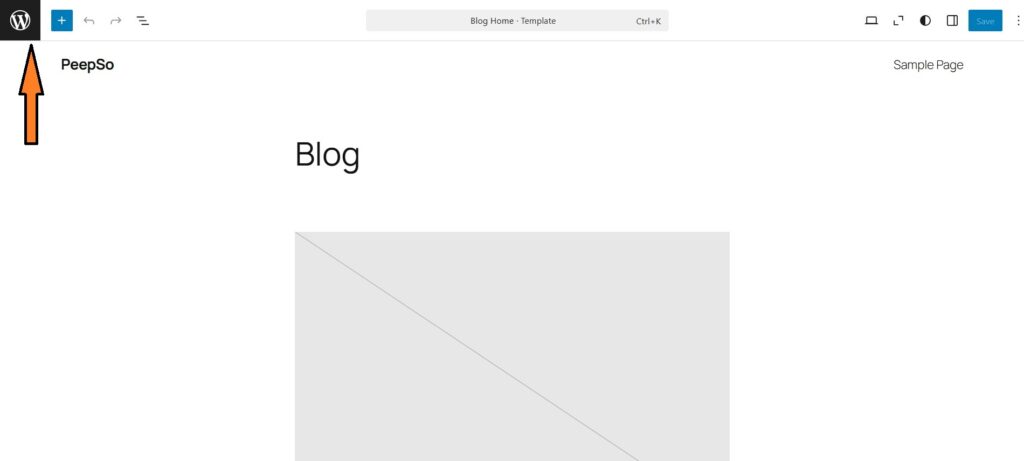
Before we confuse you any further, click the WordPress button in the top left-hand corner to actually return to the WP Admin -> Appearance -> Editor -> Templates screen. Once your site icon is set up, this WordPress logo will be replaced with your own site icon.
Now that we ended up on WP Admin -> Appearance -> Editor -> Templates, it’s time to explain probably the most important thing you need to know about Block Themes. Templates are the bread and butter of Full Site Editing.
Every page, every post, and every part of your site on a Block Theme will use a template.
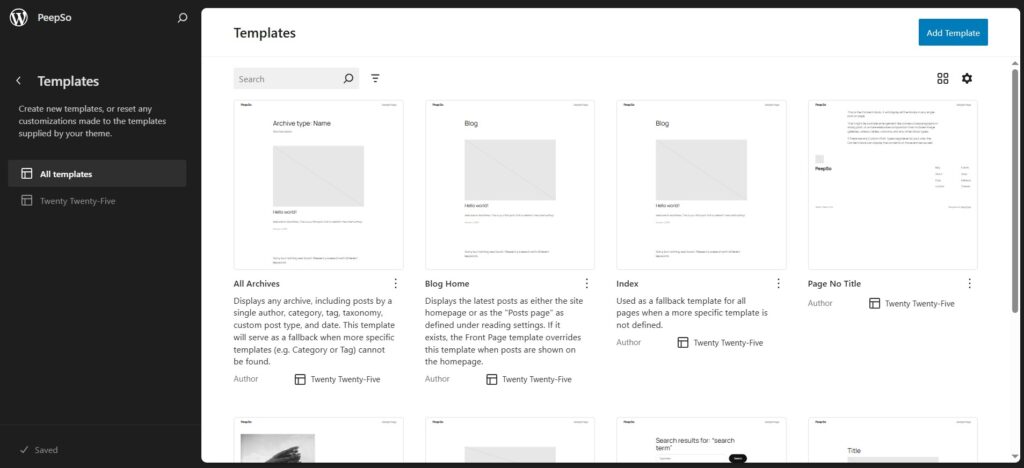
As shown on the screen above, Twenty Twenty Five Theme has already prepared templates for all the pages your site could ever technically use. Let’s do a quick practical exercise:
- Scroll down until you see the template for the 404 page, the one with the tree in the wind (with Twenty Twenty Five Theme)
- In a new tab, open your site using a random URL, for example
https://yourtestsite.com/gdffjfdgsftgsdghsdf–This will definitely trigger the 404 page. - Observe the page on the frontend. It’s using the template from the editor, right?
- Now go back to Editor, and click on the 404 template to edit it.
- Make any change to the 404 template; for example, remove the image.
- Save the template and reload the page from step two to see your changes in action.
Let’s do another practical example. After installing WordPress, it added a Sample Page.
- Go to WP Admin -> Pages and open the Sample Page to edit it
- Expand the Settings sidebar of the Gutenberg editor if it’s not already expanded
- Switch to Page tab
- Click on Pages link to change the template
Note: Steps 2, 3 and 4 are indicated with arrows on the screenshot
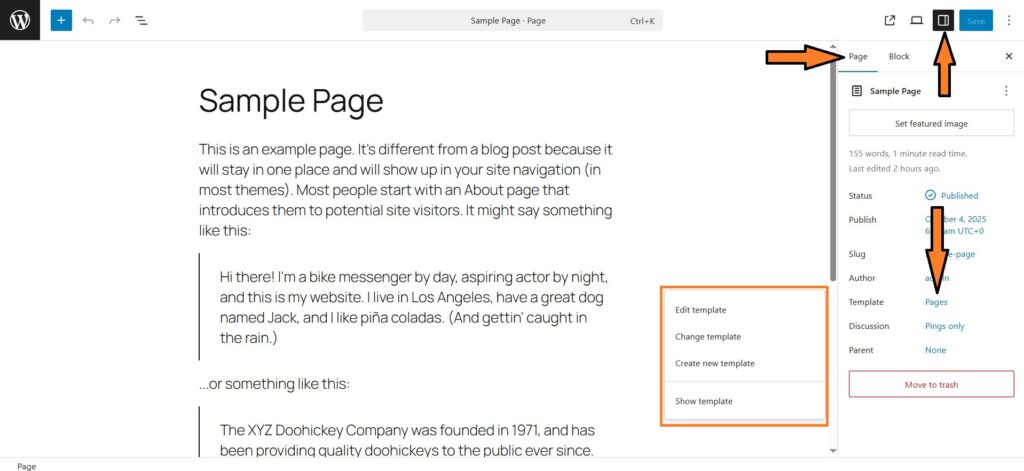
Here you can either edit the existing template for the page, switch to a different template, or create your own.
I hope that after these two practical exercises, the importance of templates is a bit clearer. As I mentioned earlier, templates are probably the most important part of Full Site Editing and the first thing you need to understand about Block Themes because everything on your site will use templates.
Author’s note: Without a solid understanding of templates, it’s difficult to grasp how a Block Theme works as a whole, and that’s something most external tutorials never explain.
Adding PeepSo & PeepSo Block Theme
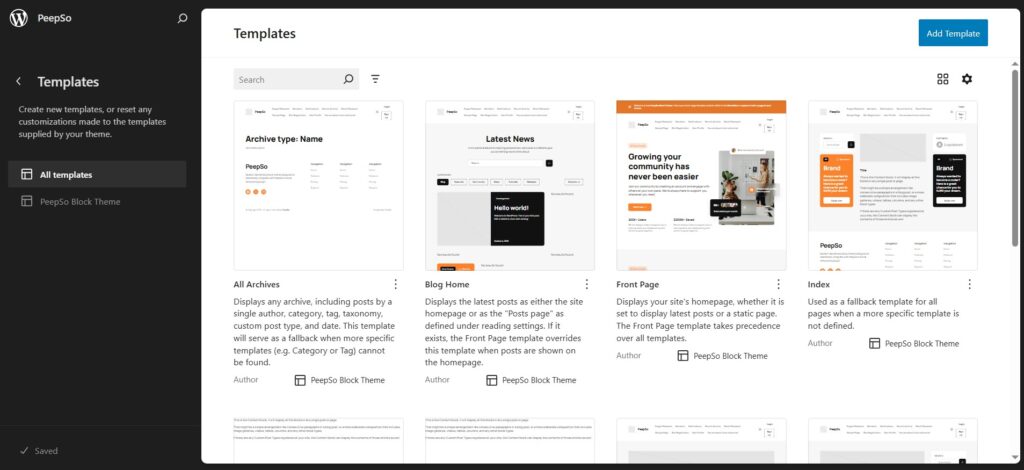
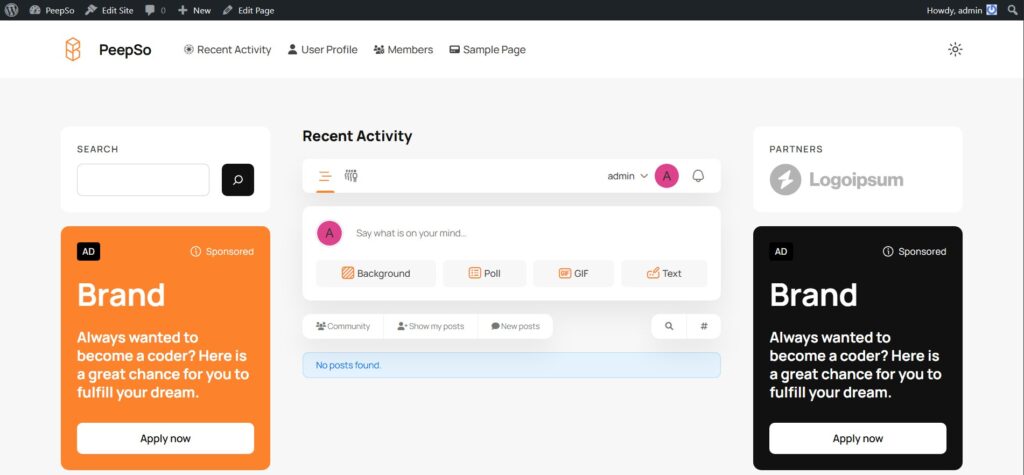
Default Block Themes in WordPress, like Twenty Twenty Five, are a great starting point. But most of us want to do more while using our preferred theme, so let’s install PeepSo and the PeepSo Block Theme to dramatically change the appearance of our website. Simply installing the PeepSo Block Theme updates the entire site, applying new templates.
You can try reloading the 404 page from the previous exercise to see how the new templates are applied, or open the front page to discover a dramatically refreshed and stylish new homepage. If you take a look at the editor and templates now, you’ll see that the PeepSo Block Theme has applied its own templates to your pages. Of course, you can edit all of them or even create your own.
Back To Start
Now that we hopefully understand templates as the most important part of FSE, let’s start from the actual beginning. To access the Site Editor from the backend, go to WP Admin → Appearance → Editor.
This is the true start or home page of the editor. You’ll immediately notice that there are five (5) menus.
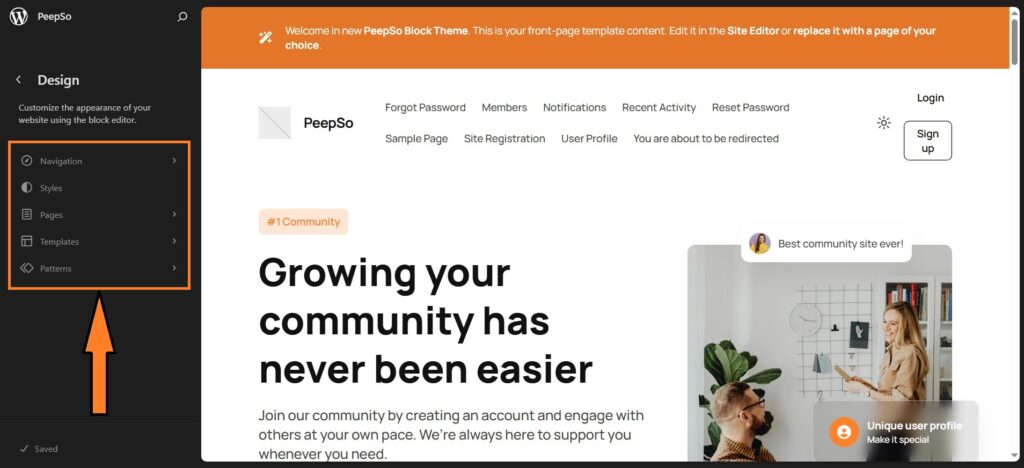
Each of these five menus serves a different purpose within FSE:
Navigation – Naturally, this handles your site menus.
Styles – Responsible for your site’s visual identity, including fonts, colors, shadows, and backgrounds. It even lets you customize individual blocks. Funny, isn’t it? A Block Theme that goes all the way down to the smallest details, allowing you to customize the very building blocks it uses to create your site.
Pages – Allows you to edit all of your site pages individually.
Templates – The most important part, and I can’t stress this enough. We covered them first for that very reason.
Patterns – Think of patterns as reusable blocks, small snippets you can use to speed up the design of pages or templates, or to create a block for quick use, such as an upsell or promo code. Patterns are extremely important for faster design of the website, especially when starting from scratch. I’ll provide a few examples when we discuss patterns in a dedicated part of this guide, and later on, I will use sidebar patterns to quickly replace the entire sidebar in our own custom template.
Patterns can also contain “template parts” – Template parts are used for headers, footers and sidebars
Navigation
What is a website without navigation? It is one of the most important parts of any site and must be consistent, clear, and easy to understand. With a default installation, this is often not the case. I’m not sure why WordPress does this to itself. An otherwise very powerful and easy-to-understand system seems to make things unnecessarily complicated, pushing people away without any real reason or need.
Take a look at the default menu that WordPress created for us:
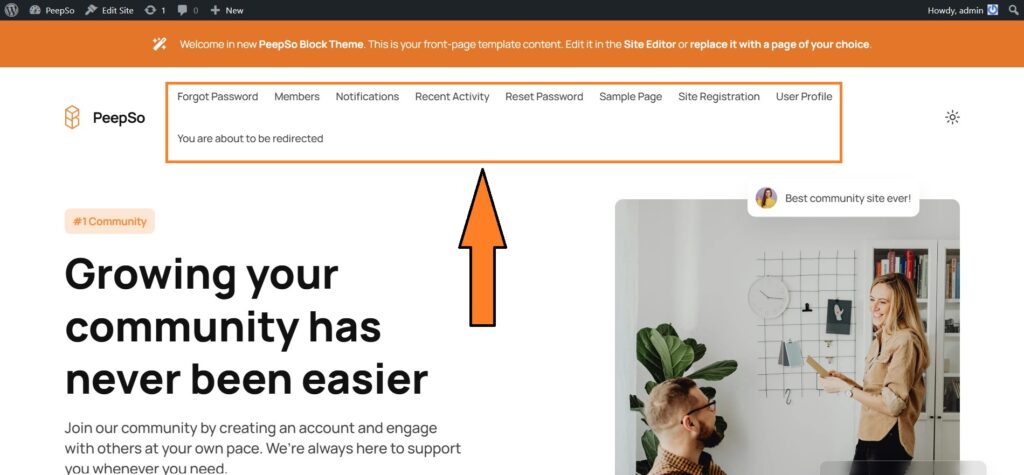
It looks like someone just listed all the available pages on the site and threw them into the menu. Pssst… pro tip: that’s actually exactly what happened.
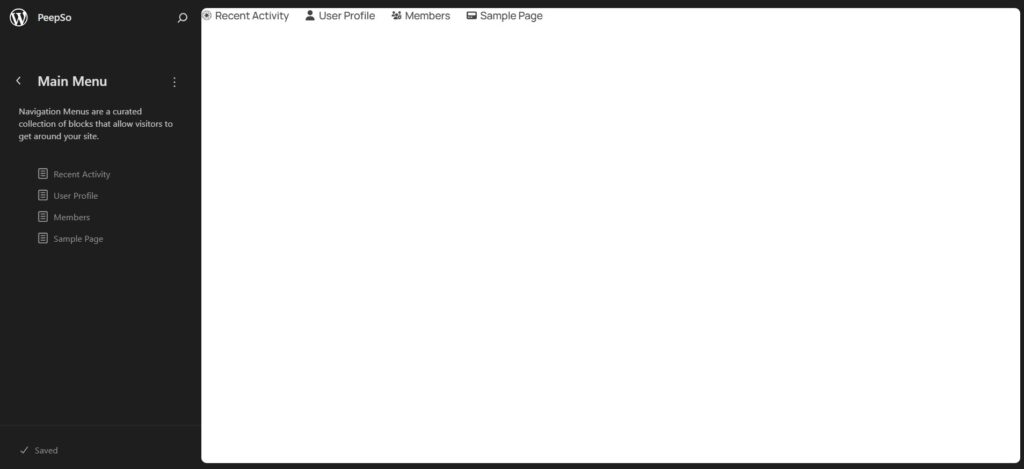
Let’s fix that, shall we? We need to go to WP Admin → Appearance → Editor → Navigation.
For some reason, WordPress created two menus for me, both named Navigation. I don’t need two menus, but if you want, you can create as many as you like. You might want a footer menu later, or a different menu for mobile screens. For now, let’s simply focus on the basics. Remember, walk before you run.
If you expand any of the menus, there will be a 3-dot configuration where you can manage the menu.
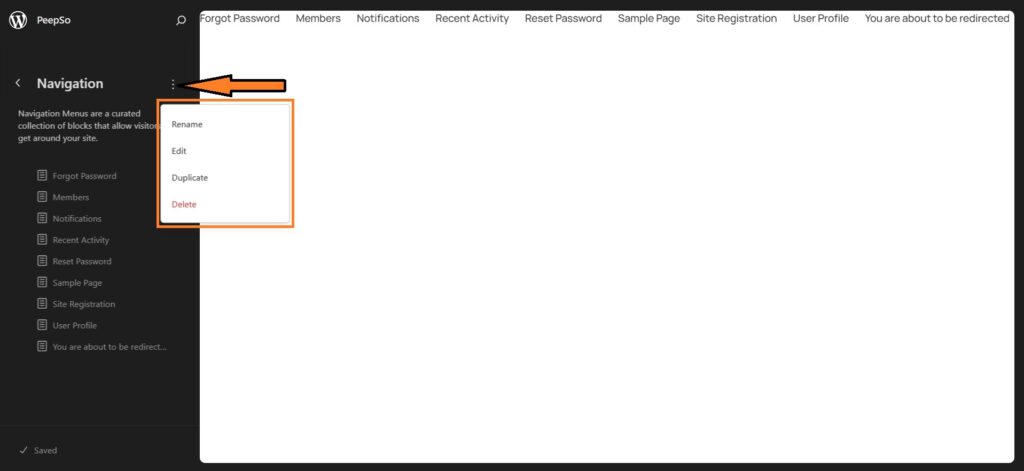
I’m going to delete one of the menus, rename the one I’ll be using to Main Menu, and then click Edit. A screen like this will appear.
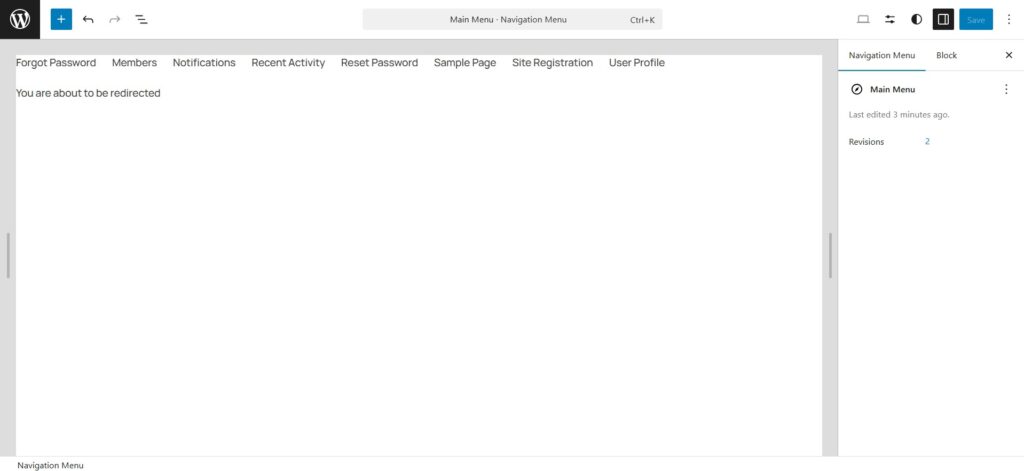
To edit the menu, simply click on any item.
To delete a menu item, just remove it like a piece of text. Place your cursor next to it and press backspace. Keep pressing backspace until it’s deleted.
As you move around the menu, you’ll notice a blue + icon appearing. This is the editor asking if you want to add a new menu item at that spot.
You can also add a new menu item by clicking the + icon at the end of the row.
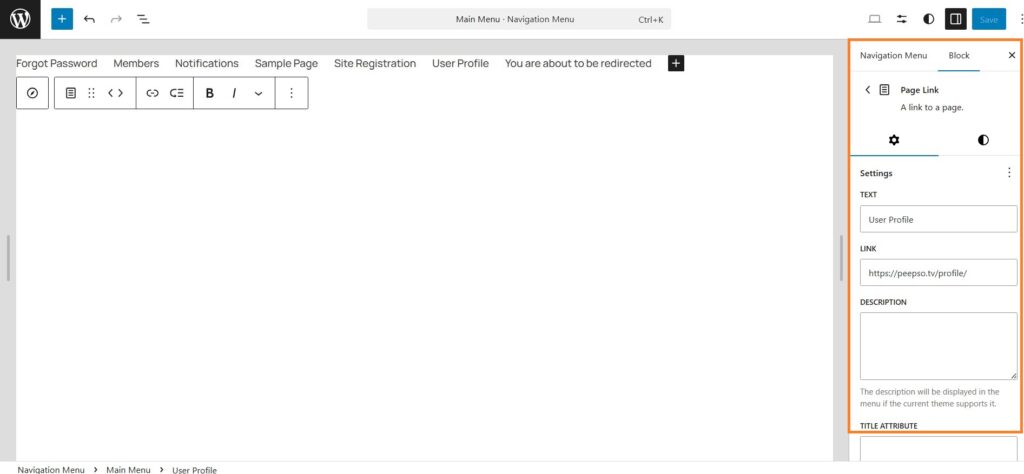
When you click on an existing menu item, a sidebar expands with additional settings where you can change the title, URL, and even the icon or animation.
I can already hear you asking, “How do we create mega menus with all the dropdown bells and whistles?” And I’ll say again, walk before you run.
That said, there is a completely new mega menu block available for use in your templates. It’s still in the early stages, so while you can create a template using that block and apply it to your menu, that topic is best saved for a completely separate tutorial.
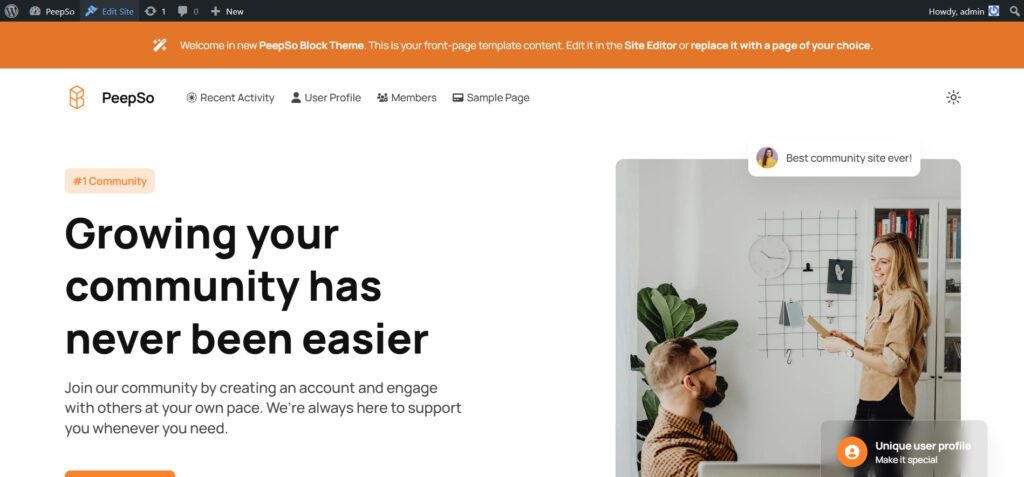
For now, I’ve arranged my menu to look like this.
The change is reflected immediately on the site.
Styles
The Styles menu is where you manage your site’s overall visual identity. It allows you to customize fonts, colors, backgrounds, shadows, and other design elements that define your site’s look and feel. Beyond global settings, it even lets you adjust the appearance of individual blocks, giving you precise control over every part of your site. Everything is presented in an intuitive and easy-to-understand way, so there’s probably no need to go into all the details here.
Pages
From here, you can quickly edit each individual page. It works exactly the same as accessing a page through WP Admin → Pages and editing it there; it’s just a bit more convenient.
We’ve already covered Templates, so the next topic to explore is Patterns and Template Parts.
Patterns (and Template Parts)
Patterns and template parts are reusable blocks or snippets that help you design pages, templates, or individual sections faster and more efficiently. They are particularly useful for new sites where you need to build many pages quickly. You can simply reuse a pattern or template part such as header, footer or sidebar within a template.
Another practical use is for creating promotional messages or codes. Imagine having 300 blog posts and needing to display the same promotional message at the end of each post. You can create a reusable pattern and insert it across all your blog posts with ease.
This illustrates that Full Site Editing and Block Themes are not just themes in the traditional sense. They blur the lines between content presentation and the templating system, giving you more flexibility and control over how your site looks and functions.
Making PeepSo Look Great With Block Theme
By default, a Block Theme comes with predefined templates that give you a visual structure of your site, and these templates are used automatically. The Pages template, for example, is applied to every page on your site by default, including all PeepSo-related pages.
You can verify this by going to WP Admin → Appearance → Editor → Templates and opening the Pages template for editing.
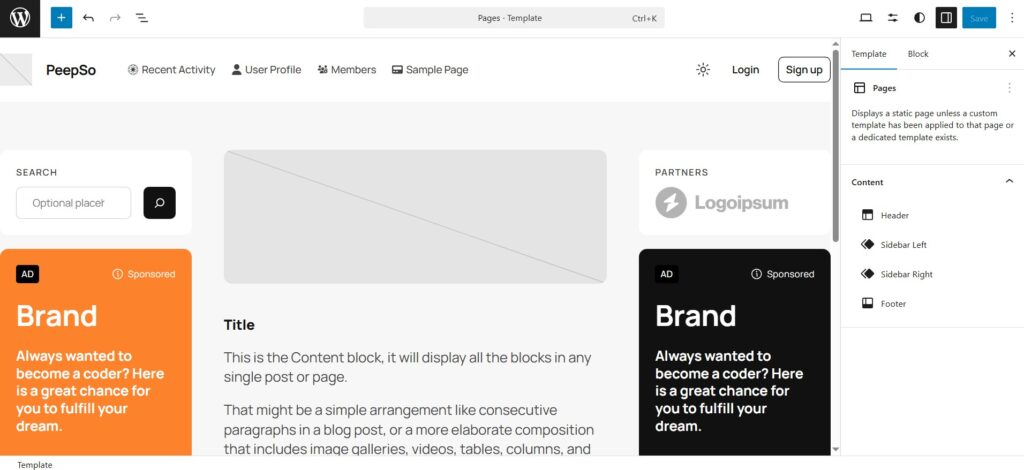
From this point on, you need to make an important decision. Do you want to modify the default template or create a new custom one to use on individual pages? This really depends on how complex you want your site to be, and both approaches have their pros and cons. For example, if you choose to modify the default Pages template, any change you make will automatically apply across your entire site, because at this point, all of our pages use the template shown in the image above.
On the other hand, if you create a custom template, you’ll need to manually assign it to each page, which means more work upfront but gives you much greater control over the layout in the future.
Author’s note: I strongly recommend using both. Having a default template that will be applied to all new pages, but also creating custom templates and carefully assigning them to individual pages where needed. This approach gives you much stronger foundation for future customization, allowing you to have completely different layouts for different types of content; something that’s difficult, if not impossible, to achieve with a single default template.
Our First Custom Template
If you decide to edit the default template, that’s perfectly fine. You can skip this step and continue following the guide in the next section. However, I still strongly recommend creating your first custom template, you’ll learn a lot in the process.
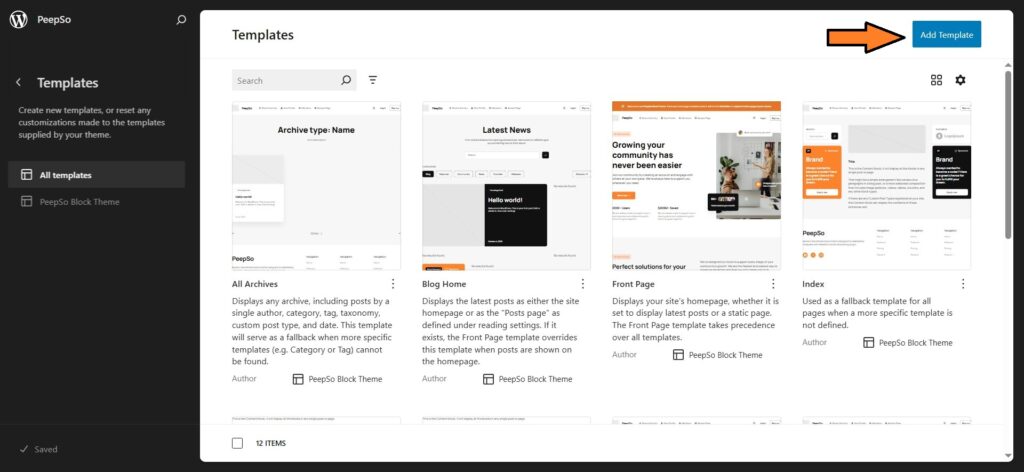
Go to WP Admin → Appearance → Editor → Templates and click on the Add Template button.
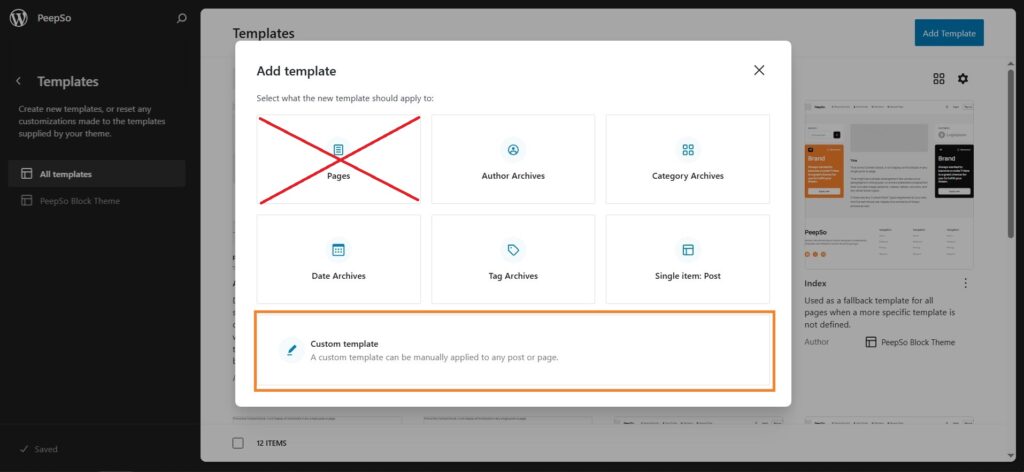
In the window that appears, select Custom Template. Do not choose Pages, that option is a bit confusing as it applies the template to selected page only.
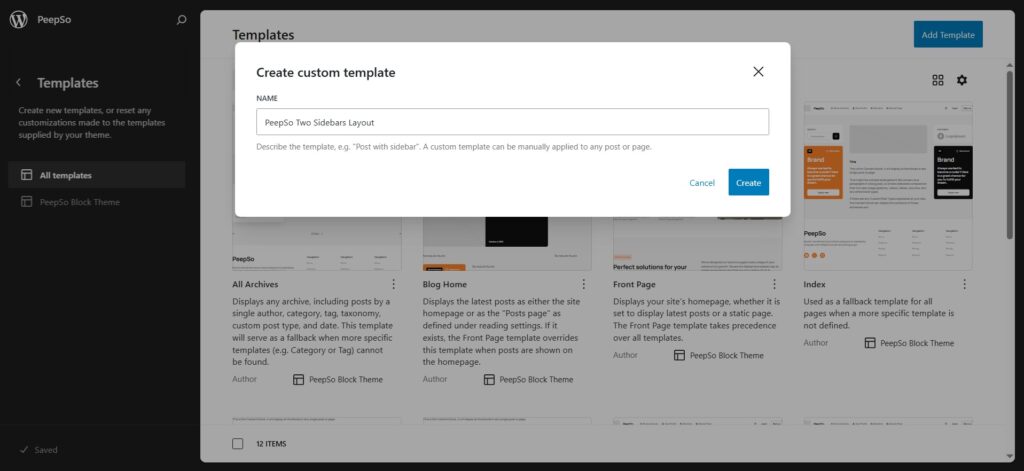
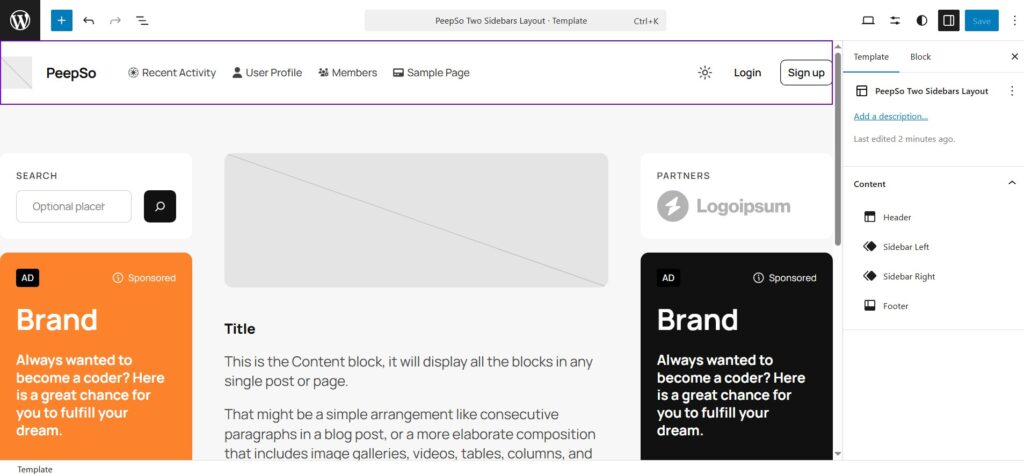
Next, give your new template a name. I’ll name mine “PeepSo Two Sidebars Layout,” but you can name yours however you like. Then click Create to proceed.
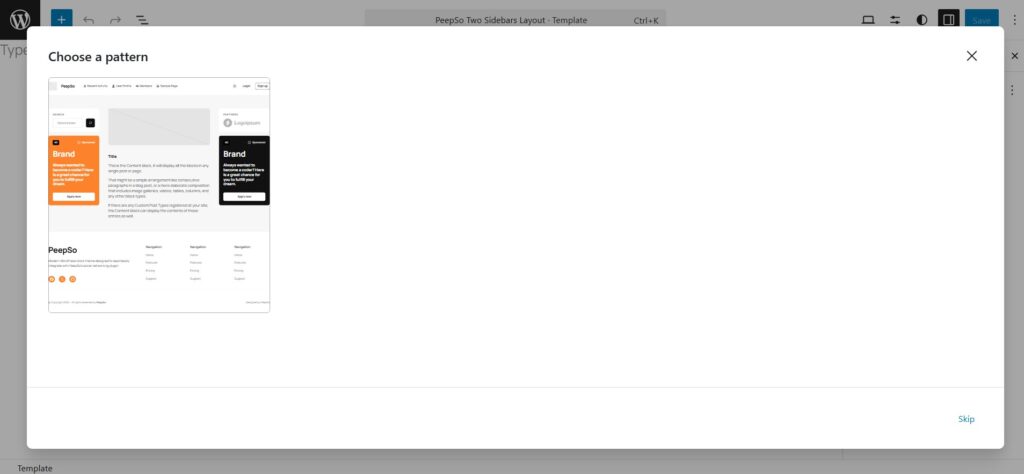
The next step is to choose a pattern. At this stage, you’ll likely see only one available option, so go ahead and select it. Later, once you create your own custom patterns, they’ll appear here as selectable options when creating new templates.
Editing Template
If you decided to edit the default template, welcome back to the tutorial. Open the template for editing by going to WP Admin → Appearance → Editor → Templates → Pages.
If you created your own custom template, your editor should already be open, and the content should look exactly the same.
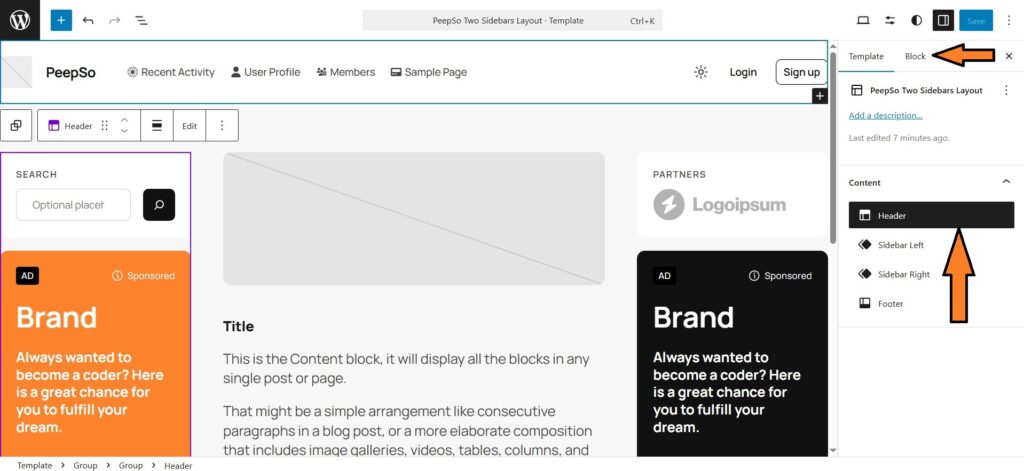
Let’s take care of the header first. We want to replace the default header with the PeepSo header. In the right-hand sidebar from the template view, select Header and then switch it to Block.
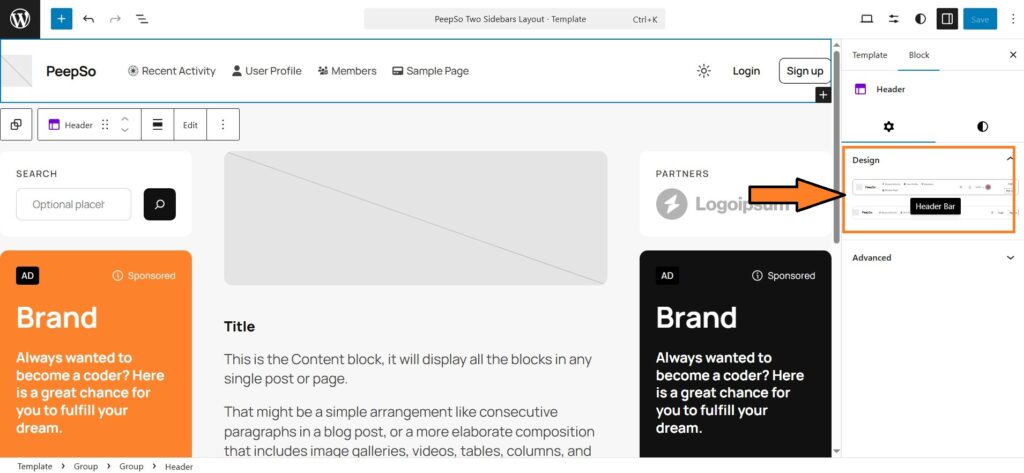
Next, choose the Header Bar in the Design section.
Now, let’s remove the featured image from this page, as it’s not really needed. Select the Featured Image block and delete it. If you like, you can also remove the Title block.

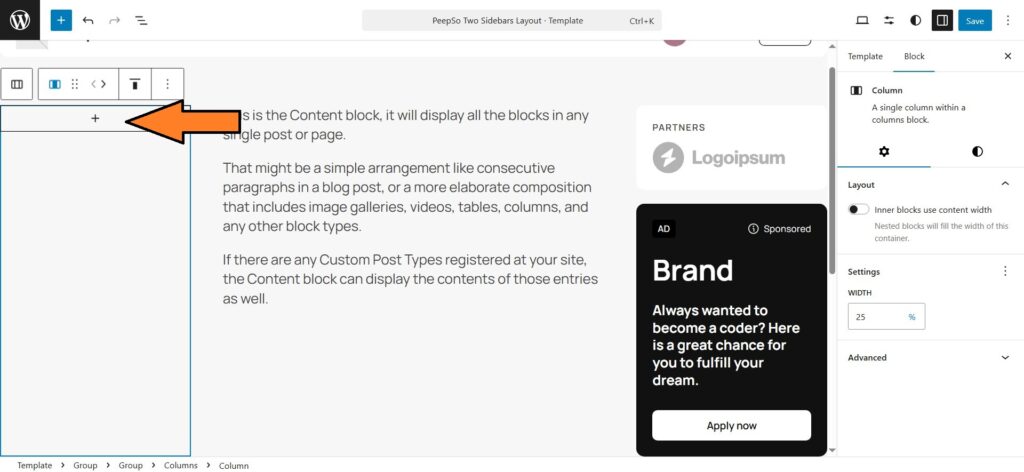
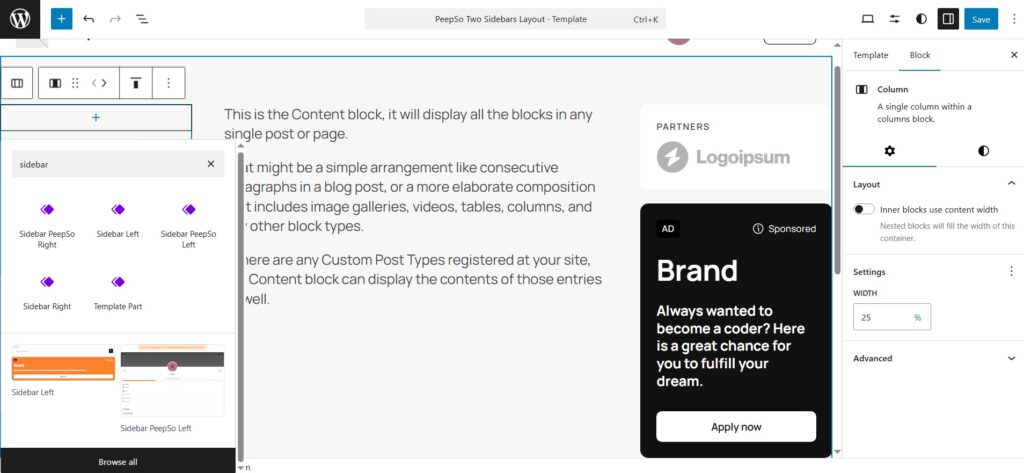
We can now focus on the sidebars and add the blocks we want to appear on the page. For simplicity, I’ll delete the default content from the sidebars and use the sidebar patterns that are already available. To do this, remove everything from the sidebar until only the + icon remains, as shown in the image.
Next, click on the + icon and search for “sidebar”. Then select Sidebar PeepSo Left. Chose the option with two diamonds icon, not the one that has a screenshot.
Repeat the same process for the right sidebar, removing any unnecessary blocks if you wish. Keep in mind that we only installed the PeepSo Free Bundle, so some elements in the pattern, like the new search from Early Access or Groups Activity, might appear as missing. Installing the respective plugins will resolve this, or you can simply remove those blocks if you prefer.
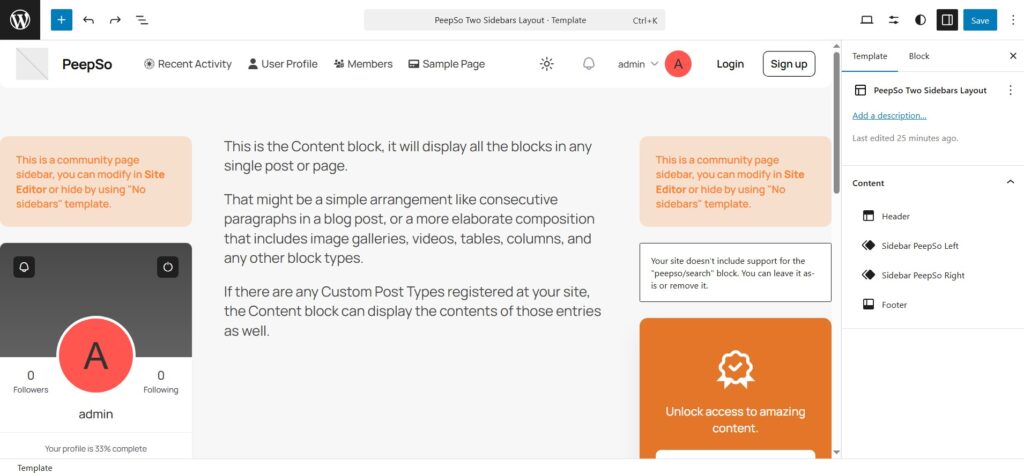
The final template will look like this for now. Of course, you can always add or remove blocks, change their positions, create new patterns, or build additional templates; the possibilities are virtually endless.
Applying the Template
If you edited the default Pages template, your changes are applied to all pages that use that template (which is all of them) immediately after saving.
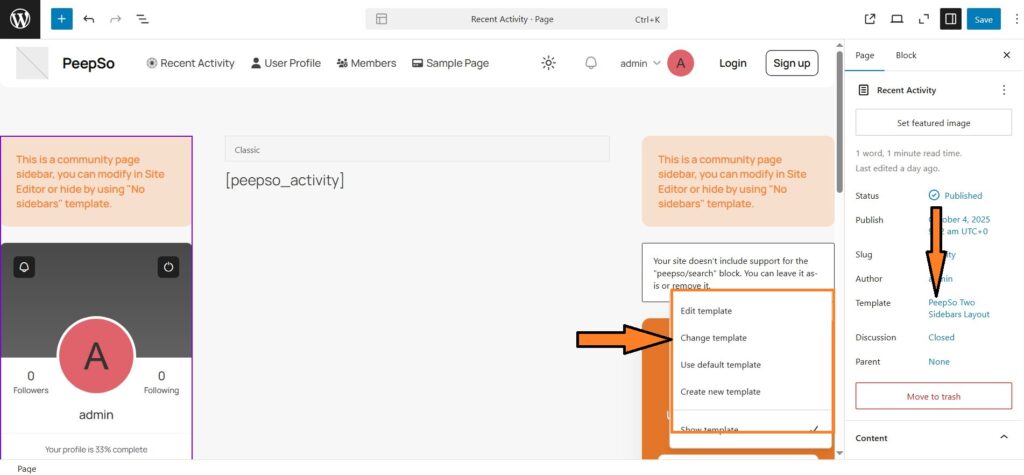
If, however, you followed the suggested route and created a separate custom template, you’ll need to apply this new template to the page.
Go to WP Admin → Pages and edit the Recent Activity page. From the Templates dropdown, select PeepSo Two Sidebars Layout (or whatever you named your custom template).
Back to You
This tutorial is already a bit of a marathon, and honestly, we’ve only just scratched the surface! For example, I didn’t show you how to apply the new story-like images as seen on our demo site.
It’s a block, called PeepSo Community Photos, just enable the Story style and place it anywhere you want, it doesn’t have to be above stream. I also didn’t touch upon changing the logo, but by now you’ve probably caught on that you can tweak your patterns and templates; wink wink, edit that header pattern and add your logo! 🎨 Go wild, experiment, and have fun. There are so many creative things you can do with Full Site Editing and Block Themes that I haven’t even mentioned.
These basics will get you on the right track, and for anything more advanced, we’ll dive into videos and official documentation. For now, we walk 🙂
Enjoy!
Reactions & comments
Comments